Cleaning out the chicken coop can be FUN! It CAN. Honest. (It can.)

Okay, maybe not really. But it’s got to be done, nevertheless.
By the way. Here’s a homeschooling tip for you young mamas: this is what you say when your littles complain about doing math, or indeed, anything they don’t want to do. Chores. Latin. Cleaning the bathroom sink. Etc. “Math (or whatever) doesn’t have to be FUN, it just has to be DONE.” Brilliant, eh? Isn’t that why you stop in at this space now and again? For Brilliance?
What do you mean, “Not so much”? Oh well. (Shrugging.)
In the same vein: “Cleaning out the chicken coop doesn’t have to be FUN, it just has to be DONE.”* See what insightful content you find on this blog? 😉
Cleaning the manure and bedding out of the chicken coop is one of the Big Jobs in the springtime at our place. I use the deep litter method of chicken coop management and so by spring, the chicken coop really has . . . you know . . . DEEP LITTER. It’s beautiful stuff, honestly, especially if you tend to burn down your compost pile again and again by mistake (snif) and need to build it up again, and if you value well-rotted manure for your garden. Which (sigh) I do, and I do.
So here’s a quick picture-tutorial of how to clean out your chicken coop, if you are also blessed with this chore every spring. And a list of tips. Tips of brilliance, by the way.
Tip 1: Don’t complain. Your tomatoes and beans and cucumbers and radishes are gonna just love this stuff! Honestly. When your neighbors’ eyes widen at the beauty of your gorgeous tomatoes, the thickness of your awesome rhubarb stalks, the size and glossiness of your cucumbers, etc., you can blush and say “Oh, that. It’s the manure.” And you’ll be right. At least, partly right.
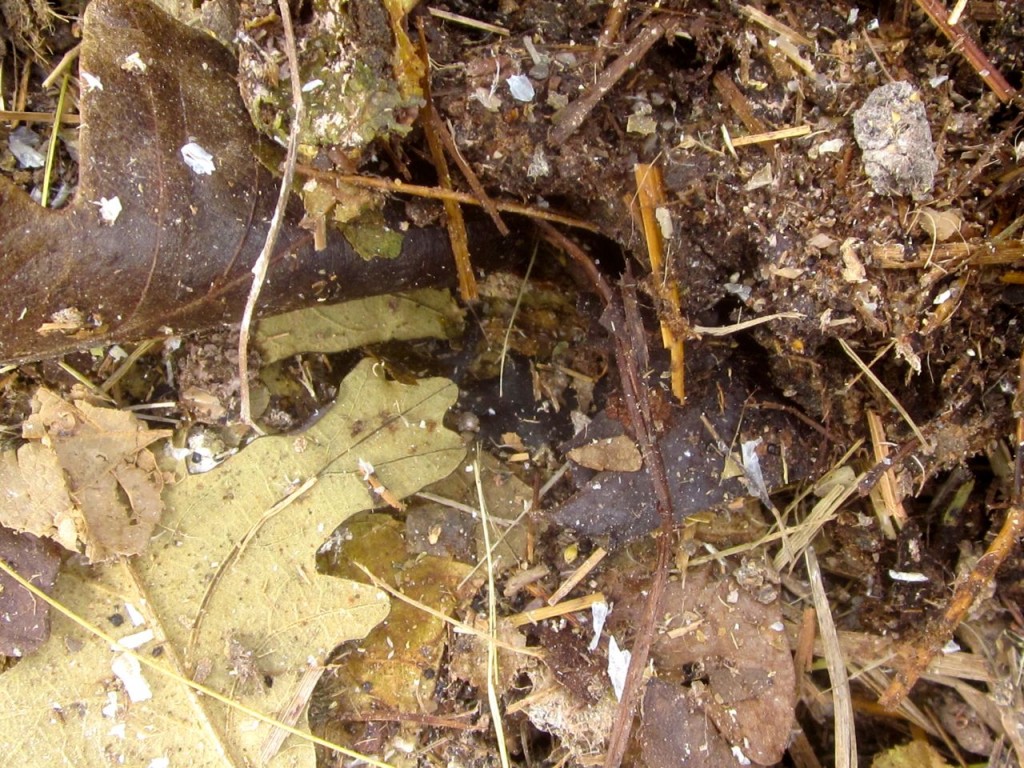
Here’s a picture of the Good Stuff: well-rotted chicken manure, a winters’ worth, mixed nicely with rotting leaves, hay, and so forth. It doesn’t get much better than this, Gentle Reader. This is a powerful breakfast smoothie for your garden. The best garden multi-vitamins ever. An injection of some powerful secret organic growing agent. Yup. In disguise.
Tip 2: This is a chore best done when it’s still cold outside. Early spring is perfect. There are no flies yet, and it’s still early enough that you can apply it to your garden. And the chicken coop won’t be uncomfortably steamy, as you work. Besides, fresh chicken manure tends to be hot, so it’s good for it to have a month or two to cool down before you plant your garden.
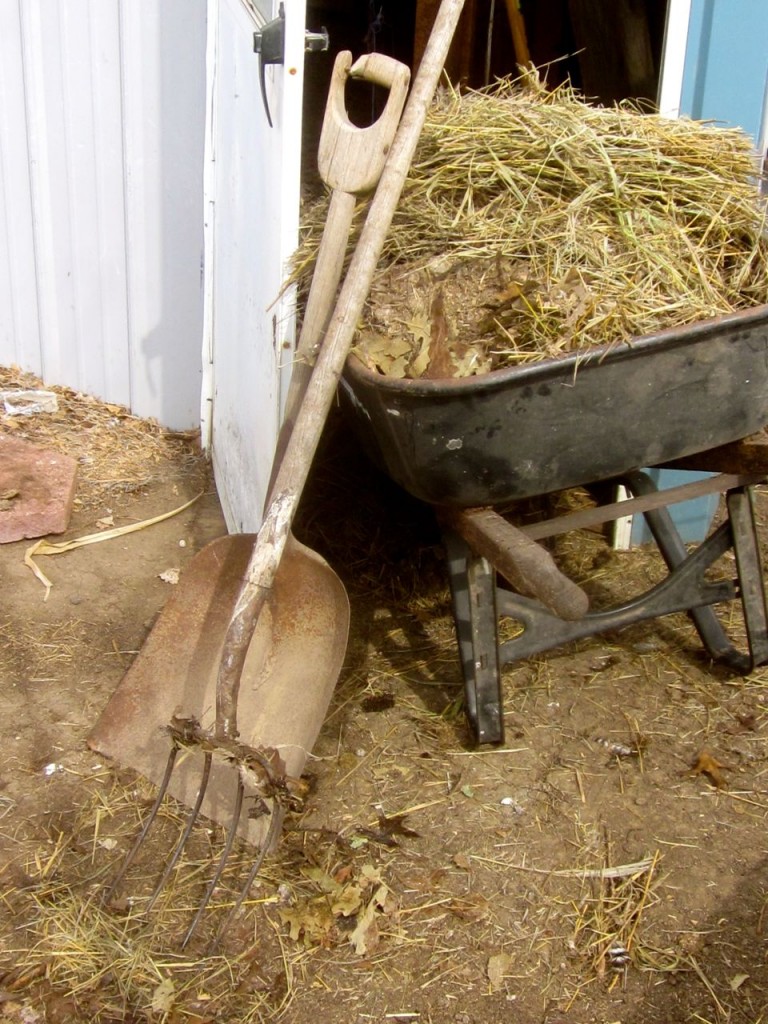
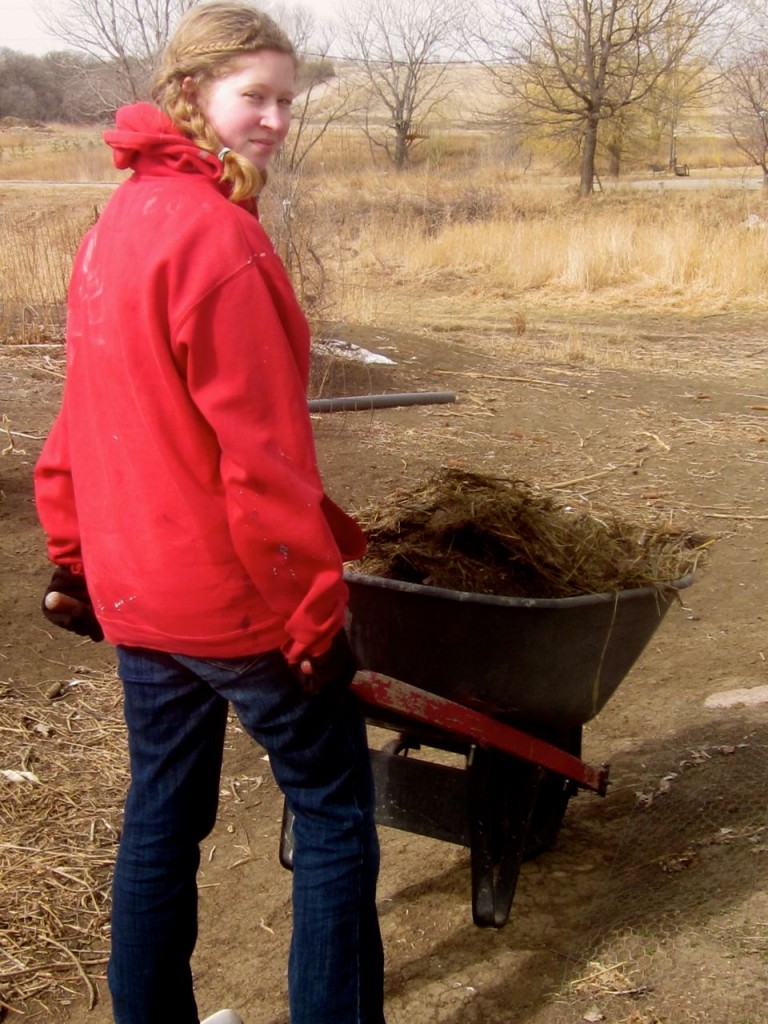
Tip 3: Assemble your tools. You don’t need much: a pitchfork, a square shovel, and a wheelbarrow (or better yet, two of them) will do it. A willing helper is optional, but very, very nice. And to make the chore go quicker, two wheelbarrows are better than one. You can be filling one, while your helper is emptying out the other one.
4. If your helper is not willing, refer to handy phrase* above.
In fact. It might be good to memorize that catchphrase. And, of course, say it with a gentle smile. Although you may get this slanted-eyes, smile of sarcasm, in reply. Oh well. You’re the Mom. You’re tough. You can deal with it.
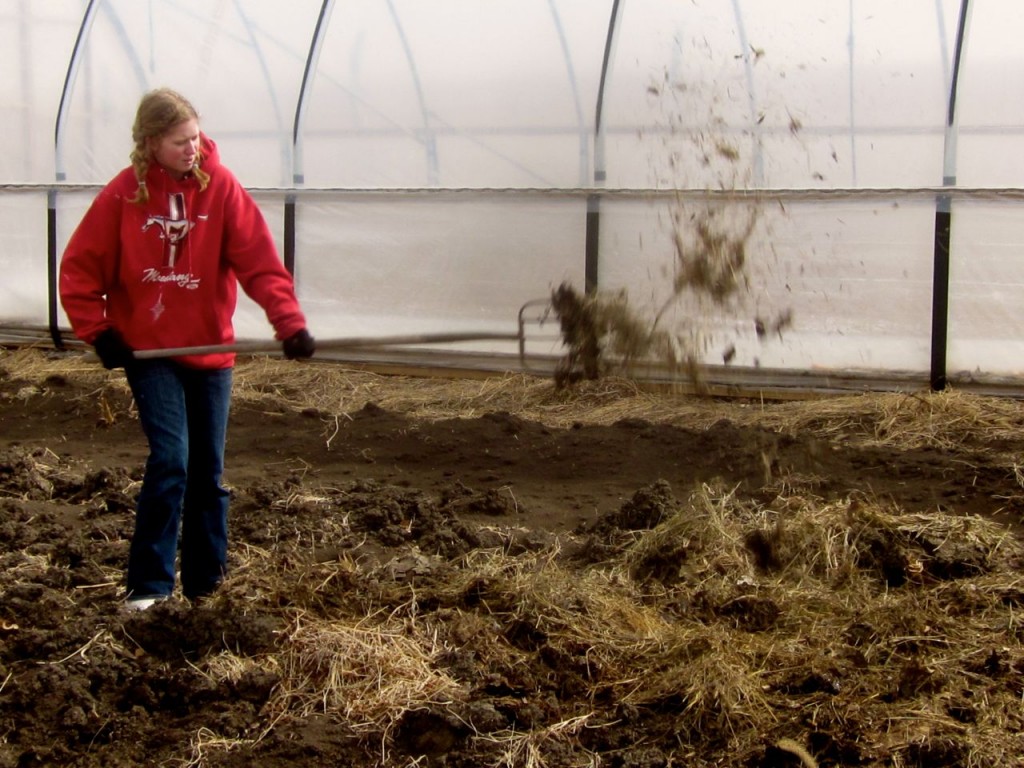
Here’s a picture of the chicken coop, below, before our clean-out. The hay and leaves and manure, though I turn them with a pitchfork every week (it only takes a few minutes, and it keeps the compost-building progressing, and also keeps the odor level of the coop down), are pretty firmly matted down, as you can see, especially under the perches.
And, because I provided water in the coop during the coldest parts of the wintertime, and because chickens are often clumsy and tip over their water buckets, there are a couple of areas that are very wet indeed. The bedding from these wet areas really ought to have been removed when it got dumped, but I don’t always get to that (guilty grimace). Also, since I’m on a de-cluttering rampage (my kiddos’ words) I’ll take the excess buckets out. I’ll leave the bucket with the oyster shell and the bucket with the sand/ashes combo, though.
5. Use the pitchfork to lift up the top layer and transfer it to the waiting wheel barrow, and then as you get down to the smaller particles underneath, use your shovel to scrape the floor clean.

6. In the early spring, you can apply the chicken manure and bedding to your garden, in a thin layer, to be dug into the soil. If you don’t clean out until later in the season, it will be best to make it a dandy addition to your compost pile.
fling lightly!
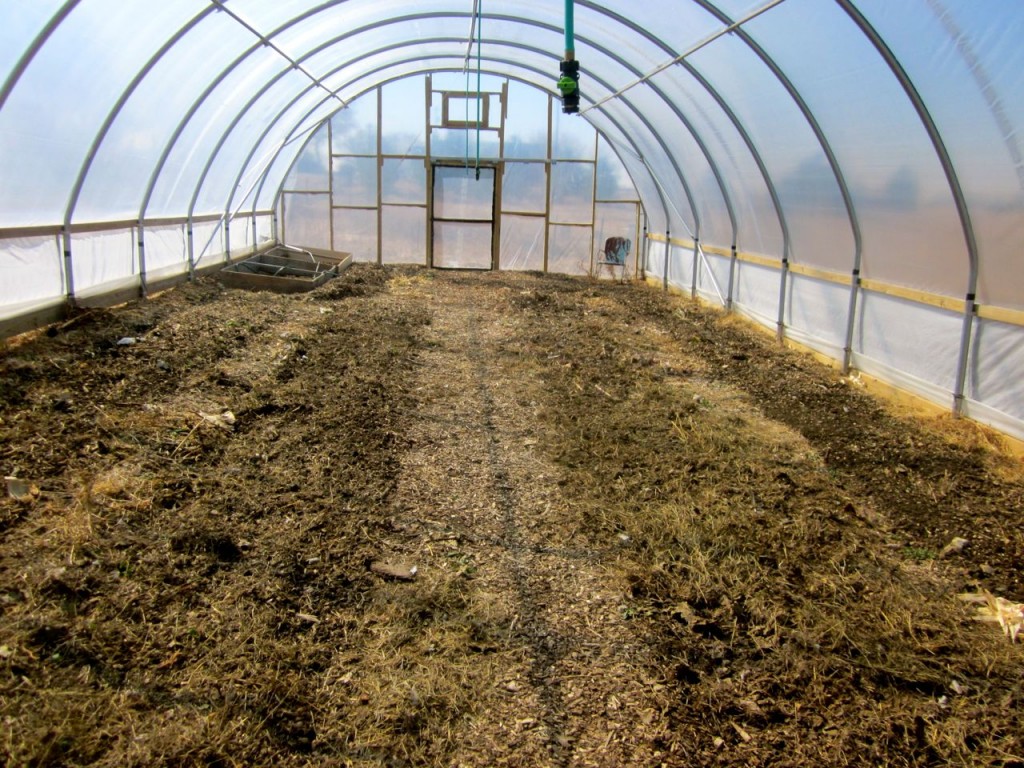
7. Your garden will smile all over, and will appreciate the manure, as well as the rotted hay and leaves. The manure adds nutrients, and the rest will improve your soil structure, especially if you continue to add goodies like that to your garden every year. My garden always needs more organic matter. And my hoop house, too, for that matter.
8. Working the composted manure/hay/leaves/etc. combo into the soil is preferable to letting it sit on top of it, especially if you’ve got tomato seedlings in the house that are triggering dreams of planting in the weeks to come. Which I do. And hopefully you do, too, by now. 🙂
Here’s my sweet dad, doing a little light rototilling. I’ve switched over to broadforking these days. I leave the paths alone, and fork up the beds.
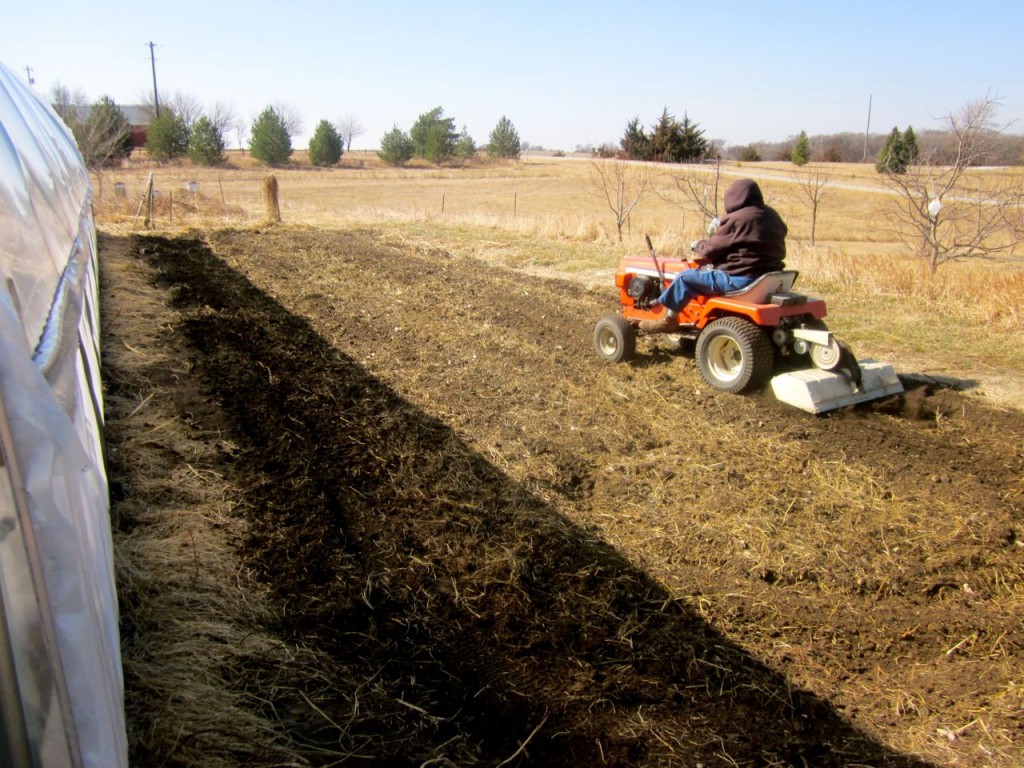
My good dad came out to rototill my garden for me. He always does a beautiful job.
Check out the hoop house soil before rototilling, with the manure sitting on top, and Ollie standing out in front:
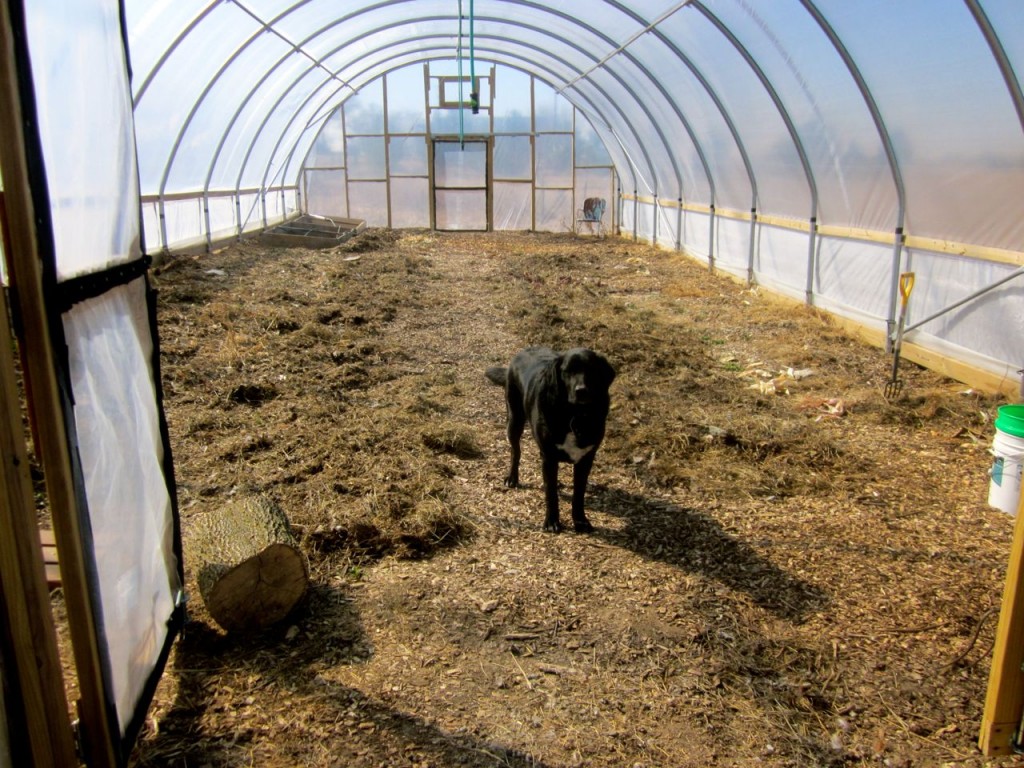
Before.
And after Dad gave it a pass or two with the ’tiller. Nearly ready to plant!
9. It’s always best to have company when doing these sorts of jobs.
10. Cleaning out the chicken coop can improve your complexion, even if it already is pretty much perfect.
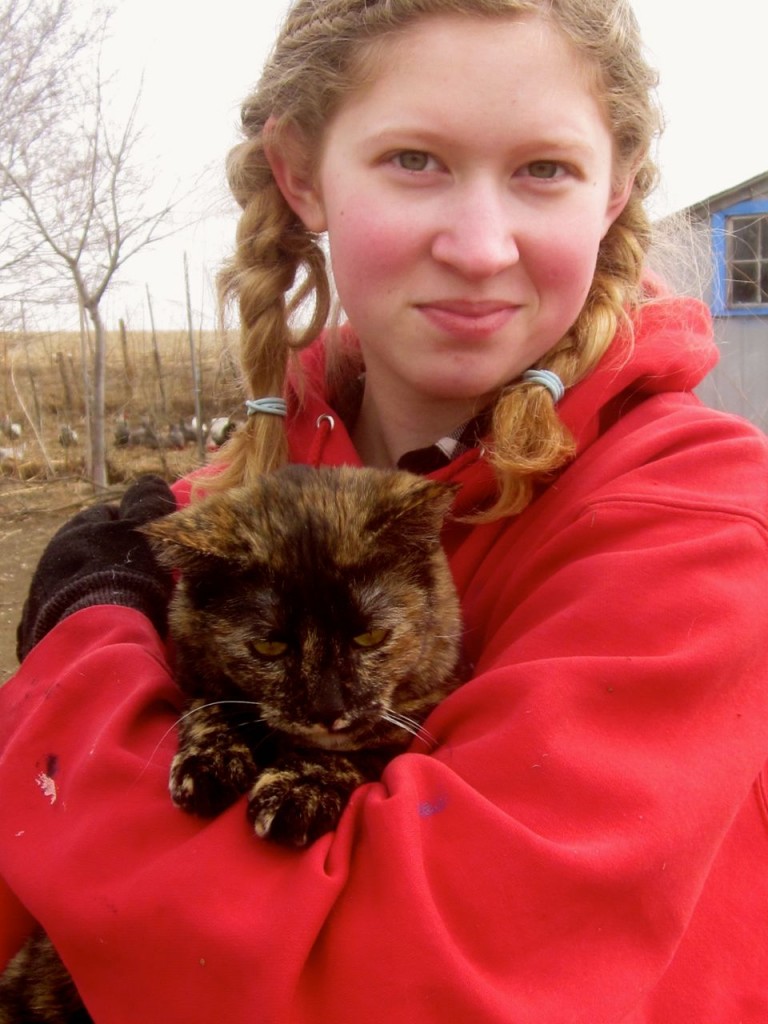
“My rosy-leaf complexion? Oh, that’s easy. I owe it all to my mother, who makes me help clean out the chicken coop every spring. It’s not pleasant, but it’s worth it for the bloom it puts in my cheeks!”
11. Once the coop is cleaned out, add fresh hay, or leaves, or straw, or whatever you have, to start the Deep Litter process all over again. A combination is especially nice, word to the wise department.Then stand and watch the chickens dig in, for a minute or two, at least. Pretty satisfying, eh?
Here’s the “After” shot of the chicken coop. The chickens were grinning. Honest.
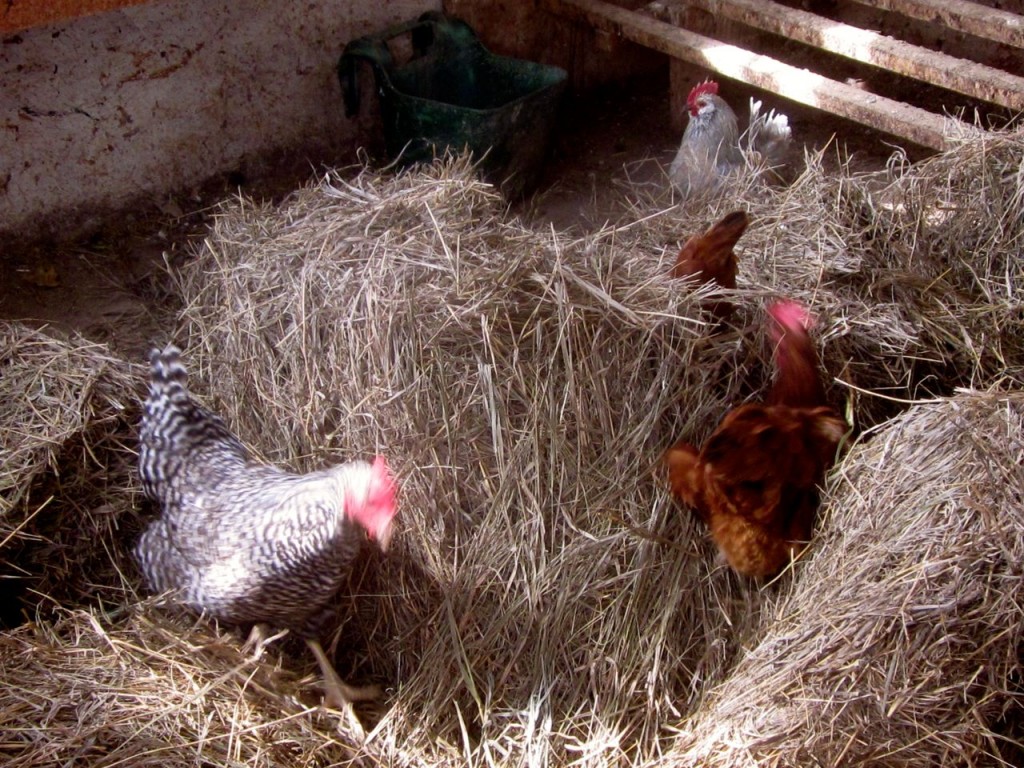
“Oh. Lovely. Lovely fresh hay. Don’t you just love that farm woman?”
That’s. It!
Hungry for more satisfying tips for making your chooks happy? Check out my ebook, “Secret Chicken Knowledge: I’m Full of it!” If you found some goodness from this post, you’ll find oodles of it in my new book. Check out the link below:
- The NEW Artisan Bread in 5 Minutes a Day . . . and a Guilty Secret
- The Night the Deer Hit the ‘Burb: Extreme De-Cluttering
Boy, is your daughter lovely! You are right about a perfect English complexion! Cleaning chicken coops is a lot more fun than cleaning out small hog sheds!!!!!
Isn’t she? And she’s just as pretty inside, Gene! That’s why we don’t let her out much. A bit afraid what’ll happen when the boys see her. 😉
I have already cleaned out my coop this year. One night I lost one of my girls. I just knew FOR SURE that a snake had got into the coop and bit her. I went on a snake hunt in the morning, and in order to be sure – really sure – that it wasn’t there, I completely stripped down the entire coop. No snake. Drat. I thought I had found the solution. Now I don’t know why she died, but at least the coop is shiny clean. Well, not so shiny, for sure, but clean nevertheless. Not sterile either. Oh well, the straw is all replaced and the girls can now be in sweet smelling straw. I also bring in bales of hay all during the year, especially in the winter. I put it around the edges of the chicken coop which is elevated off the ground about 18″. It acts as a wind break from the bitter winter winds – well, bitter in my estimation, although anything less than 60 degrees is bitter to my thin blood, being a Texan. There is nothing my girls find more entertaining that to take a flake of hay and pull it apart! There are little seeds from the hay in there. Yum. It is also a game. I try to buy straw, but our straw looks suspiciously like hay to me. After they pull it apart and stomp on it and dig through it for days on end, they finally break it down. I water it well in some places and that is even more fun. It brings in the worms! I take a hoe and make paths in it. They think this is the most fun ever, ever. They jump into the “trench” and follow right behind the hoe. In fact, I have to abandon my trench and start a new one because they have their heads, beaks, and toes right there and I can’t proceed. I leave that and start a new trench. They mostly follow the hoe, racing from one trench to the next. It entertains them all morning. After a few months, they make me beautiful compost, completely fertilized and broken down. The weed seeds sprout in the moistened hay and they love to get the new sprouts. All in all, we have a good thing going!
My goodness, Mari, that sounds like a wonderful system! I don’t think I’d get anything done at your place–I’d just want to sit and watch the action out at the chicken coop!
Loved your post, this is certainly a big job but I would not call it fun LOL but it’s one of those jobs that HAS to be done. I hope you enjoy the eggs….
Great to connect with the UBC
Pauline
Yup, Pauline, the manure is great but the eggs are awesome!
I like the idea of attitude being a choice, that can make a difference to how you view chores.
I also bet cleaning the coop is a whole lot more fun when you’re taking pictures of a servant girl doing it! I like your style! 😉
Well, yeah, Gordo, the secret word is delegation here. 😉
Oh wow! I didn’t realize so much work was involved in the process of cleaning a chicken coop. I love your fun and light attitude regarding much needed chores. And your helper’s face, with her squinted eyes, is soo funny and classic.
Thanks ChiChi!
Interesting post! I have not had to actually do this and not sure if I could lol.
It’s not as bad as it might look, Chantea!
Look up the words “beauty” or “lovely” in the encyclopedia, and you will find a picture of Miss Amalia —-
Awww, what a sweet thing to say, Dad. I’ll make sure that Amalia sees this! 🙂
I just flew the coop!
Oh, that complexion. To be young again…wait, I never had a complexion like that. And now I know why. It’s because I grew up in New York City and couldn’t keep chickens in my 4th story apartment in a 14 story building. Here’s to urban chicken keeping!
Yup. Forget the fancy creams and soaps, Alana, all anybody needs to have a complexion like that is a healthy flock of chickens to clean up after! 😉
We started cleaning out pens last week. Spring is coming slowly around here.
Soon you will have piles of woodchips 🙂 that you can put in your chicken area. Spread it around outside all over and your area will never stink! Put woodshavings inside the pen if you can get a hold of some…that’s what Paul does on BTE. His visitor never smell chick ca ca! https://www.youtube.com/watch?v=0s9xZLjN5X8
Lovely photos of the real deal. It does my heart good to see real dirty jobs being done by clean heart-ed young people. I work as a Farm-Based Educator and consequently children of all ages who benefit on many levels from farm work. I also like that your chicken coop isn’t all cutesy with pristine roosting bars. It looks like a true chicken dwelling, the one I just cleaned out here on my homestead.
I almost missed this….a how to guide to cleaning the poop from the coop. I believe that the title of your new book should be “A farmer in Paradise” you live in such a wonderful world. If little Mack is smart he will hide in the math book until all these chores are complete.