
Dutch Oven Artisan Bread: loveliest bread in the land!

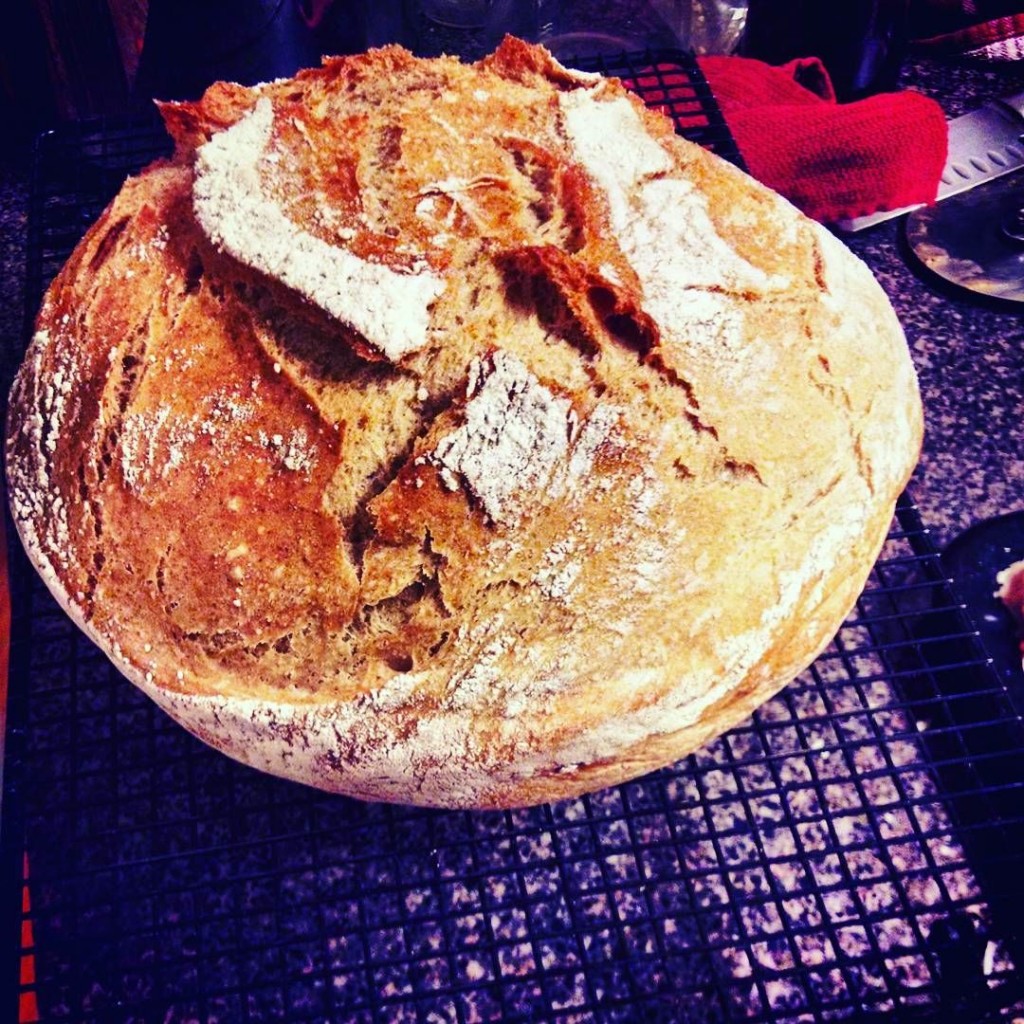
My first loaf of Dutch Oven Artisan Bread: isn’t it a beaut??
I drove all the way to Ohio to learn how to make this beautiful loaf of bread. Well, as you know, gentle reader, that’s not the reason I drove to Ohio. But I’m happy I learned about it while I was there. 🙂
My daughter-in-law, Sonia, months ago, raved about a new bread recipe: a very simple artisan bread that she baked in her Dutch oven. It seems that the Dutch oven (with the lid in place) was the perfect hot and steamy setting to make this gorgeous bread with the amazing crunchy crackly crust, and the dense and chewy interior.
That crust, Gentle Readers, that crust . . . is what causes artisan bread makers everywhere to toss and turn nights, as they dream about it. It’s the reason they buy new fancy ovens, in hopes of obtaining it. That crust is what artisan bread bakers scroll through chat groups and bread forums, looking for hints on how, precisely, to get it! (Speaking from experience here!) It’s difficult to obtain in home kitchens, for some reason, with home ovens. That crust is what sets serious artisan bread bakers apart from the wanna-be hacks. And, gentle reader. You can make this kind of bread–with the superlative crunchy crust–at home, with only one bit of special equipment:
A cast iron Dutch oven. You can use a pretty enameled one like this one:

I have one of these and I loooove it. 🙂 (affiliate link)
or you can use one like this:

Affiliate link (natch): I’d like to get one of these soon!
I bought myself a pretty enameled one last year, after wanting one for years and years. Look at me and my bad self, buying myself something so pretty and useful! And now I’d like an black cast iron one, too, just because I like cooking and baking in seasoned cast iron pans so much. I think I’m going to have room in my new pantry for two Dutch ovens. They will get along just fine in there. 🙂
It blows me away that Amazon.com has free shipping on these pans—they are so heavy!
The only other thing you need to make this bread, is this recipe. (Thanks, Sonia, for sharing it, and for the baker chick blog, where Sonia found a similar recipe, to begin with). And what a bonus: it’s easy-easy-easy-peasy.
Try it!
- 2 cups all-purpose flour
- 1 cup whole wheat flour
- 1½ cups lukewarm water
- 1-2 tsp sea salt
- ½-1 tsp yeast
- In a large bowl, stir together the flours, salt and yeast.
- Add the water and stir together with a wooden spoon, until mixture resembles a shaggy dough.
- Cover dough with plastic wrap and let sit in room temperature for 8-18 hours. Dough will bubble up and rise. (Note: mine only sat at room temperature for two hours and it turned out great.)
- When dough is ready, preheat oven to 450 F.
- Turn the dough onto a well-floured surface, and with floured hands form the dough into a ball. Cover with the plastic wrap and let the dough rest.
- While dough is resting, put your Dutch oven into the oven as it preheats, for at least 30 minutes.
- Carefully remove the Dutch oven from your oven, removing the lid very carefully.
- Slash the loaf, and carefully place it into the Dutch oven.
- (If your Dutch oven isn’t enameled inside, place a square of parchment paper in the bottom of it, to prevent sticking.)
- Replace the cover, put Dutch oven back into the oven, and bake for 30 minutes, covered.
- Remove the cover and bake for an additional 15 minutes uncovered.
- Bread will be golden, crusty and delicious!
- Pull out the softened butter, baby!
A note about timing: with the really long rest-and-rise period for this dough, you could conceivably stir it together in the morning and let it sit all day long while you are at work, or going about your business, and then pop it into the oven to have with dinner. Your life will be better because of this. I promise.
Hey you, come back tomorrow because I have a feeling I’m going to have some happy news that I can share with you then . . . 😉
Did you, precious Amy, say “crusty bread?” Mmmm I can smell it now. And I just so happen to have a cast iron Dutch oven…quick story….I found (or rather “it” found me) a coral colored “Le Creuset” Dutch oven at a…believe it or not…yard sale…..for the AMAZING price of….(wait for it………..)
……ready? 50 cents! YES by golly I did. And it was beautifully seasoned inside to boot! Have you priced those puppies lately? I think I got a deal don’t you : ? ) I really like the coral color but I have my eye on a soft pink one also…YES 2 Dutch ovens is ideal!
I had a friend give me a similar recipe a couple years ago! We love it. 🙂 My mother-in-law got on a Dutch oven kick and bought me a pretty enameled one from Sam’s for my birthday. I wasn’t very familiar with it, so it took me a bit to get excited. But now I LOVE it! Especially for soups, and breads, and so much more! My friend had told me that this bread recipe didn’t work well with whole wheat flour (which disappointed me), but I think I will try your version since it has some whole wheat flour in it too. It makes me feel healthier. Thanks for sharing!
Do you butter or oil the pan at all? Thanks!
Amy,
I do give the pan a quick rub of olive oil, with a paper towel. Good question!
After the bread is in a ball shape how big is it supposed to get before putting in the the oven?
Meredith: it’s not a fussy dough, but I think a good rule of thumb is to let it get about twice as big before you put it in the oven. Good luck!
You say yeast. What kind of yeast? Instant?
Thanks for the recipe. Can’t wait to try it!
KAren, I buy dried yeast in bulk at the grocery store or Sam’s Club. I keep it in the freezer to keep it fresh and it has never let me down!
Thank you for reply. What kind of yeast though. There is instant (fast rise) and there is traditional active yeast. I don’t have Sam’s club up here but do have both kinds of yeast. Just need to know which one 🙂
Traditional active yeast is what I use, Karen.
Hi Amy,
I found your website by accident while looking for a recipe. I just love it and have told some people about it. I have only tried one of your recipes but hope to try a lot more. I made the artisan bread and for someone who has only made bread from the frozen loaf state other than one other time when I tried a so called “no fail” bread that would have made a great door stop. My bread turned out wonderful the FIRST time, and I have made it 3 times since with one raising right now. My ONLY problem has nothing to do with your recipe but with my knives; trying to cut slits in the dough before you bake it. Can you suggest a good brand of knife that is sharp enough for this task? Thanks in advance.
Hi Betty! Thank you for sharing my site with your friends! Okay, about a knife to slice the dough. It is tricky! I honestly don’t know the brand of the knife that I use, but it is a very sharp long serrated knife (that my mother-in-law gave me, actually). It also works very well for slicing the bread once it is baked. If you want to get high-tech, there is a special little tool that you can buy called a “lame” and it works very well, too. Here is one: https://www.amazon.com/Mure-Peyrot-Adour-Professional-Protective/dp/B00G9FEUR4/ref=sr_1_4?ie=UTF8&qid=1531700434&sr=8-4&keywords=dough+lame
But be forewarned! It is really SHARP! I’ve got one but I seem to have trouble keeping track of it. *shivers* I’ve sliced my finger on it more than once. (I always know where my big serrated knife is. Well . . usually.)