Taking hardwood cuttings: propagating magic that’s so easy to do

I’m inordinately proud of all these cuttings. Bryan asks: “Where will you plant them?” Hmm. Good question. (I’ll find a place.)
It’s nearly The Season again, gentle reader. And no, I don’t mean The Season–as in, the giddy dancing days of balls and social affairs vis-a-vis Downton Abbey–what I’m referring to is something eminently better.
So. Much. Better.
We are on the giddy cusp of the joy-filled, verdant growing season again here in Nebraska. Maybe where you are, too? We recently had several weeks of Real Winter, for a change, including a week where the HIGH temperature each day rarely eased up over 0°F. During that icy week, we had a nearly-record-breaking night that plunged to -28°! (That’s below zero.) And snow. Lots and lots of snow.
I know that winter’s not finished with us yet . . . but the first day in the 60s came this week and I’m . . . where’s my bathing suit? Is it too early to go to the lake? Can we go fishing now? Where’s my tennis racket?
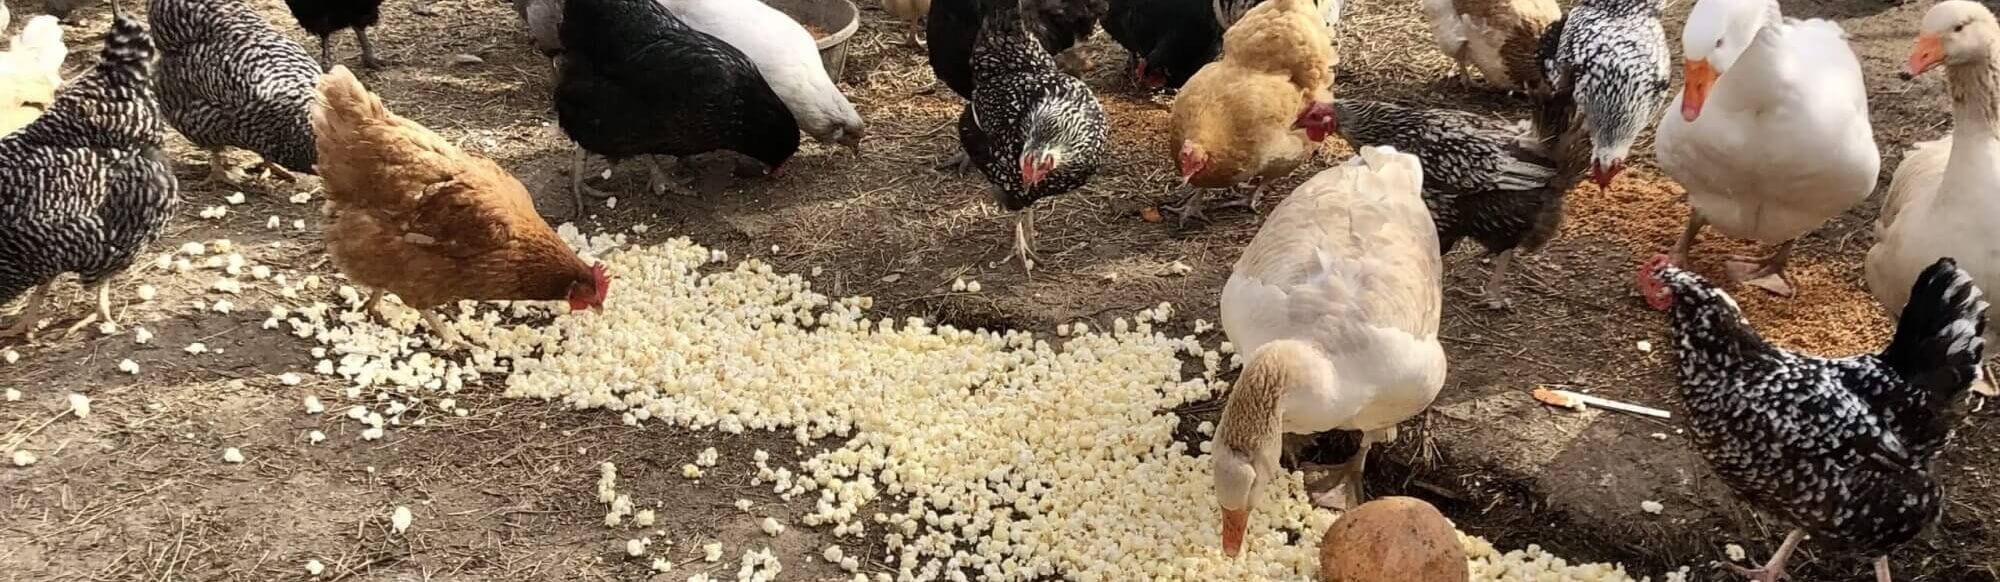
Speaking of snow . . . what’s your opinion on that controversial topic, gentle reader? I kind of hate to admit that I love it. Although I do have to get out in the snow several times a day, every day (chickens, geese, ducks, dogs, and cats don’t feed themselves, after all)(nor husbands and sons, now that I think of it), I rarely have to get into my car and tool away to work in the city, so I can enjoy the snow the way God intended, from inside my warm toasty house. I don’t have to face the anxiety of, say, sliding into the ditch or getting stuck in a snowdrift. Not often, anyway.
I mention this random fact to cover my backside because the following scenario has, does, and will continue to occur . .
Me (while gazing at the fluffy flakes floating down): I love snow!
Everybody else on the earth (glaring at me, collectively): That’s just because you don’t have to drive to work every day.
Me (blushing, and realizing–once again–my mistake): Oops.
Me (whispering quietly, in spite of it): I love snow.
In fact, this week when all the multitudinous mountains and hillocks of snow melted rapidly away, leaving puddles and muted shades of gray and brown . . . I felt a let down of my spirit. Yes, it should have made me happy . . . after all, my heart thrums spring is coming, spring is coming . . . but brown and grey is not half as pretty as white, white, white, and blue.
Snow: it’s a natural wonder and I feel sorry for the folks who don’t get piles of it every winter.
Did I just admit that? Oops. Don’t hate me.
Speaking of natural wonders and other cool stuff, I’m one of those people who loves to go into nurseries in the city and admire all the plants. Many are quite expensive. I never buy those. I will buy, occasionally, a houseplant on clearance that has been damaged in shipping, or a few 4-packs of pansies (’tis the season) or a couple of ON SALE! succulents (who doesn’t?) but I merely admire the expensive nursery plants. I’m a tightwad, even in the area of plants.
Believe it.
Occasionally I take a picture of one of those fancy expensive plants. For reference. Or to send to a plant-loving child of mine . . . Wouldn’t you love one of these? Me too! If only we both had unlimited houseplant budgets!
Which is why I was so delighted to learn how easy it is (dare I admit, even thrillingly simple!) to grow new plants from hardwood cuttings. For free.
Truly. You’re gonna love this. And this simple task–performed at the final chapter of winter, before the gardens are awake yet but precisely when you really need to get your hands on some sort of gardening task, lest you go mad–is a great time of year to take hardwood cuttings and turn them into new plants.
Now, if you spend a little time sitting at the feet of your favorite search machine, you’ll discover that there are as many ways of propagating from hardwood cuttings as there are designs on snowflakes. (Well. Maybe not that many, but I did so want to pull in the topic of snow again.)
Rather than presenting you with a rundown of all these methods of propagating, I’ll just cut to the chase and tell you the way I do it. It seems to work well for me.
Here’s a list of some of the most popular plants that are easy to propagate with hardwood cuttings, by the way:
- Abelia
- Aspen
- Barberry
- Blueberry
- Butterfly bush
- California lilac
- Camellia
- Current
- Dogwood
- Elder
- Euonymus
- Forsythia
- Mock orange
- Rose of Sharon
- Viburnum
- Weigela
- Willow
But, Why bother?
Oh boy. I’m so glad you asked. You are so astute to ask. So many reasons, I’m just going to start a list . . .
- It’s super fun to grow things.
- Free plants!
- Perhaps you–like I–have several bushes or trees on your property that you’d like another one or two of (or twenty-five), but you have no idea where you’d buy them.
- Along that line, mail order plants can be expensive ($hipping!).
- Maybe you want to start a business, say, growing elderberry bushes and selling the berries. It might cost you a small fortune to grow dozens of elderberry bushes, but you can buy just one and multiply it through hardwood cuttings!
- Growing your own stuff is a smart thing to do. And you’re a smartie-pants; I can tell from your choice of reading material. (snort)
Okay, you’ve got me. What do I do first?
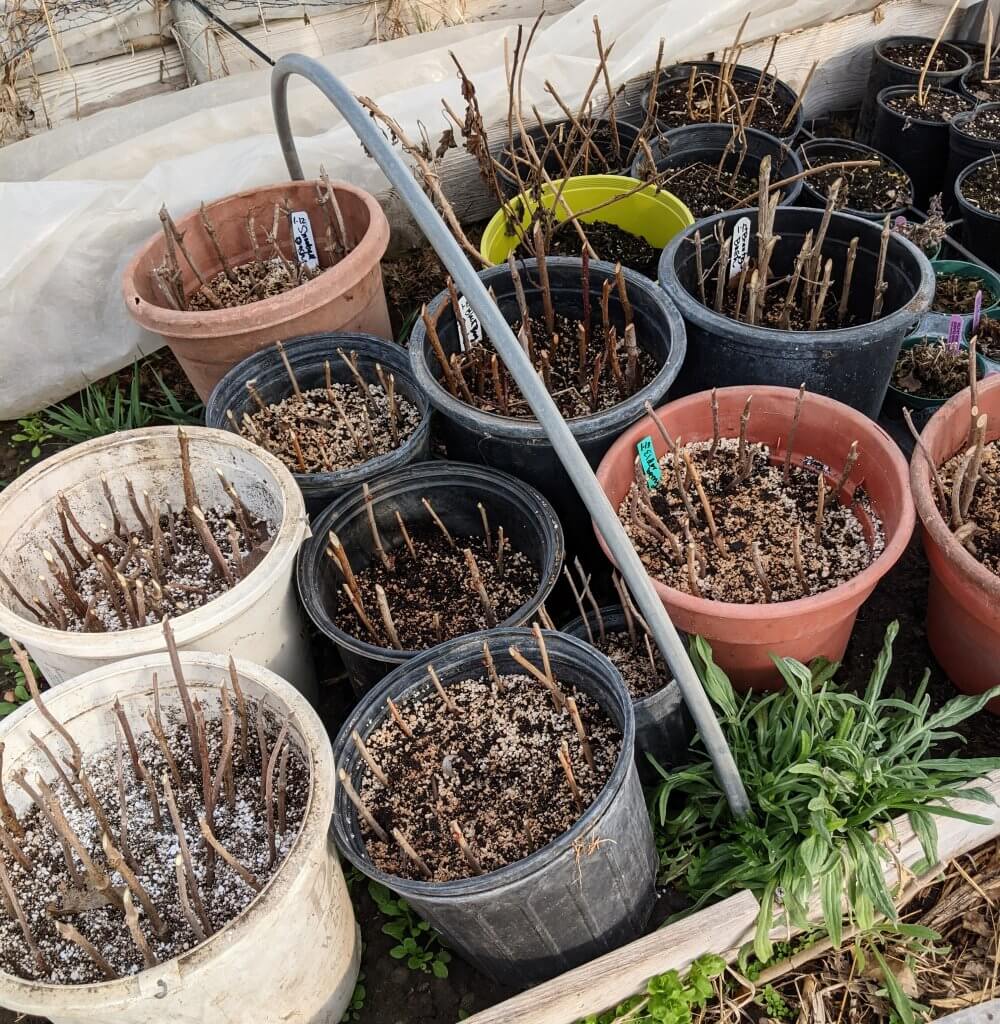
Let’s start with what you need to assemble first, before you do the fun part.
- Compost and perlite (found at garden centers) mixed to the ratio of approximately 4 parts compost + 1 part perlite.
- Some plastic pots (I re-use large pots–gallon-sized are great, but y0u can use whatever large pots you have.)
- A sharp clean pair of pruning shears. (I purchased this Felco pruners and leather holster a few months ago and believe you me–it makes me feel like a princess, strutting around with that baby on my hip!

4. Propagating powder. The type below is what I use, though–surprisingly, and annoyingly–the price has doubled since the last time I bought it! You may want to buy another brand, or a smaller amount, depending on how many cuttings you want to root. This particular product works really well propagating many woody and semi-woody plants. (The jar says that it will provide enough powder for rooting something like 10,000 cuttings, so it’s pretty cheap per cutting.)

Have you got your materials assembled? This is your gardener’s mise en place, basically.
Yes, now how do I do it? aka can I get to the fun part yet?
Okay, grasshopper. Here we go.
First, Cut.
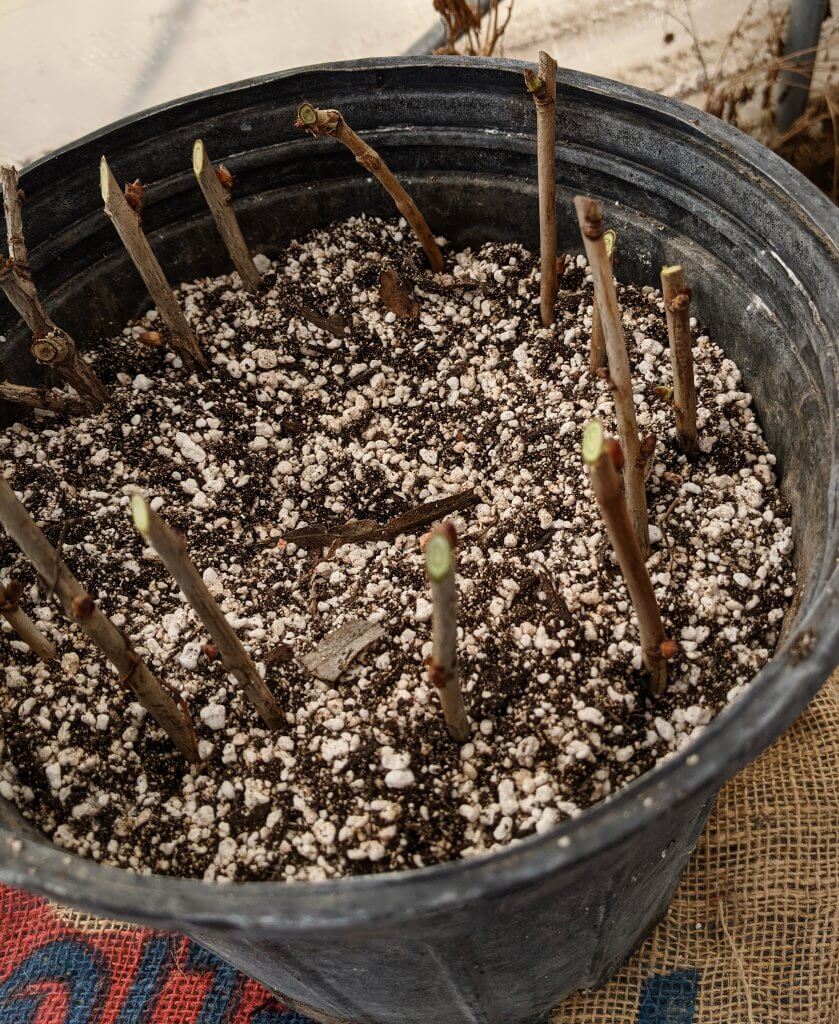
Crummy photo, but you can see that the inner part of the cuttings is a nice healthy green, as it should be. Soon those buds will swell and leaf out. (yippee!)
Take cuttings of your tree or shrub in the dormant season (before it has begun to leaf out). Cut a 6- to 8-inch-long section of stem, preferably from the previous season’s growth. The top of your cutting should have an angled cut (to prevent water from settling and causing tip rot) just above a single bud or pair of buds. The bottom of the section should have a straight cut just below a single bud or pair of buds.
Note: your cuttings should be green inside, when you cut them. If they are brittle and brown or grey, discard them.
Second, Dip.
Dip the base of each cutting into your rooting-hormone powder, which can be found at most gardening-supply stores, or through mail order companies.
Third, Stick & Trim

Dampen your special mixed potting soil, put it into your pots and use another stick to make a hole in the soil. Then place your dipped cuttings into the hole, all around the edges of the pot. Like so. Trim the top of the cutting (at an angle) so just a couple buds are left above the potting soil.
Fourth, keep cool someplace near a light source
An ideal place for your cuttings would be out of the weather, but in a protected place, like your garage, or an unheated hoophouse, or a shed, and near a window so your cuttings will get some sunlight. Make sure it’s in a spot that you pass each day, so you can check it every now and then. It should start out fairly dry, but as the weather warms up, you want to increase the moisture until it’s consistently damp.
Fifth, move your pot outside after threat of frost is past
By now your cuttings should be putting out roots, and eventually you’ll see swelling buds and leaves, too. You’re gonna feel like doing cartwheels at this point. Again, make sure you don’t let your pot dry out entirely (an inch of water a week is good).
Sixth, wait until late summer to plant out
It’s hard to wait, but you need to wait until the roots are well developed.
Celebrate! You’ve just learned how to make new plants from hardwood cuttings!
You smart thing, you.
If you want to learn how to propagate hardwood cuttings in a few other ways, check out this article, which has many different methods. One day I’ll try the rolling-in-a-sheet-of-plastic method. It looks pretty cool.
Say, do you have a friend or a relation who would enjoy reading this sort of content? Could you do me the immense favor of sharing this post with them? And I’d love it if you popped into the comments below to tell me if you’ve done any propagating. Or just to say HI!
Thank you for popping in! Take care.
*hugs*
- Layered Green Vintage Salad for Winners!
- Raise your Buttermilk Bar, Baby: Make your own Cultured Buttermilk!
Amy – as you stated, there are many ways to do hardwood cuttings, but I do mine pretty much the same way you did yours, and I’ve done several hundred of perhaps 12 different woody species since I bought this piece of prairie 20 years ago. One difference is that I prepped and stuck those elderberry and jostaberry cuttings you gave me last fall almost as soon as I got them, along with some serviceberry cuttings from plants I started maybe ten years ago. I have also done catalpa, various willows, cottonwoods and Austrees this way. (Hint: it doesn’t work so well with apples, apricots, cherries and pears.) 100% of the hardwood cuttings I did last fall are already leafing out beautifully. Another diff is that I will divide the pots of five cuttings each into individual 1 gal pots, fairly soon and plant those in the field in June.
Important: There are three different Hormodin products. For Hardwood cuttings, you should use Hormodin 2 or 3. Hormodin 1 is for easy-to-propagate soft tissue cuttings like herbs and some perennial flowers. Yes, all of them are expensive but how else can you get a nice shrub for a few pennies and 6 months of wait time before putting ’em in the ground.
Gene,
I would have done exactly the same thing, if I had a heated greenhouse like you. But I’m grateful that my unheated hoophouses at least are getting warm enough most days that my cuttings are beginning to take root! And thanks for the tip on the Hormodin products. I knew that there were several, but I didn’t know the differences among them.
Hi Amy, For part of my Christmas presents to my daughter and granddaughters, I took hardwood cuttings of my double pink Rose of Sharon (that my daddy passed down to me in the early70’s ) . I really hope I did it right and they grow. You should have seen the look I got from my girls when they each lifted the wrapping paper and found a pot of sticks! But, when I told them the name of the plant that will grow-I got some sweet little smiles and thank yous!
After reading your article, I’m inspired to make some more cuttings from a few other bushes.
Sharon,
I really love that idea–giving cuttings of a special bush or shrub. In fact that opens up an entire new project idea . . for example, we have a huge willow tree that all the kids love. It would be so much fun to take cuttings, and then when the cuttings root, pot up the baby trees and give them for Christmas gifts! Thanks for sharing, Sharon. 🙂
Sharon’s comment reminded me of something. I have successfully propagated rose of sharon for my long time former partner and friend (because her name is Sharon too.) And the same year I successfully propagated forsythia the same way and how both of us have several 10 ft tall forsythia shrubs in our yards. Same with tree hydrangeas, although I have not tried it with ordinary shrub hydrangeas.
Aww. Rose of Sharon for Sharon–that’s pretty neat, Gene!
I’m inspired! Tomorrow I’ll be snipping twigs of many colors, shapes and sizes. I love snow too, but I could have done without all those sub-zero days!
Janet, yes, me too. In our part of the state, we had a second-ever coldest night— -28 degrees! Brr. That’s scary-cold. Have fun with taking your cuttings!
Okay, Amy, you got me. I ordered myself a tiny jar of a rooting compound to start some butterfly bushes. My friend has a color that I want and I have a color she wants! I also have 2 blueberry bushes and would like 1 or 2 more of the same kind, so hopefully it’ll work for those too. Most of the smaller jars seemed like they were Homodin 1, as far as I could tell, so I think that’s what I got. I’ll try it!
Tina,
Oh, what fun! Trading cuttings like that. I’m eyeing some spirea (the old fashioned kind!) that I’ve seen growing along our country road, and will take cuttings before it leafs out. Good luck! I hope all your cuttings root!
Boy time sure flies, two posts since I last checked. Snow… I mostly like it. Things look so sanitary after a fresh snow, no matter what is under it. I grew up in Bend OR, and it snowed a lot when I was a kid there, doesn’t seem to as much anymore, but I don’t live there now so maybe it does. (I am about 4 hours drive away however) I learned to drive in snow, so that doesn’t bother me. It’s those that don’t know how that bother me. Where I live now, it rarely snows on the valley floor, but when it does, there is nothing but chaos. The older I get however, the less I can tolerate the cold.
Timely post, this one, as I want to increase my blueberry plants. Mine are starting to show the buds now, so it maybe too late, but I will try. Thanks for posting this.
Dave, I would try anyway (with the blueberries). All you have to lose is a few trimmings of your blueberry bushes!
(When we lived in Memphis, they rarely got snow, but when they did–watch out! There was only one snowplow in the city at the time, and nobody knew how to drive in the snow–slowly!!–and the city was a total disaster if they got even a half-inch of snow. We, being Midwesterners, felt quite superior (at least we had that–we could navigate a car in the snow!) and had fun on snowdays going out and helping motorists who were stuck along the roads. That, and going to movies because the theaters were empty, of course!!