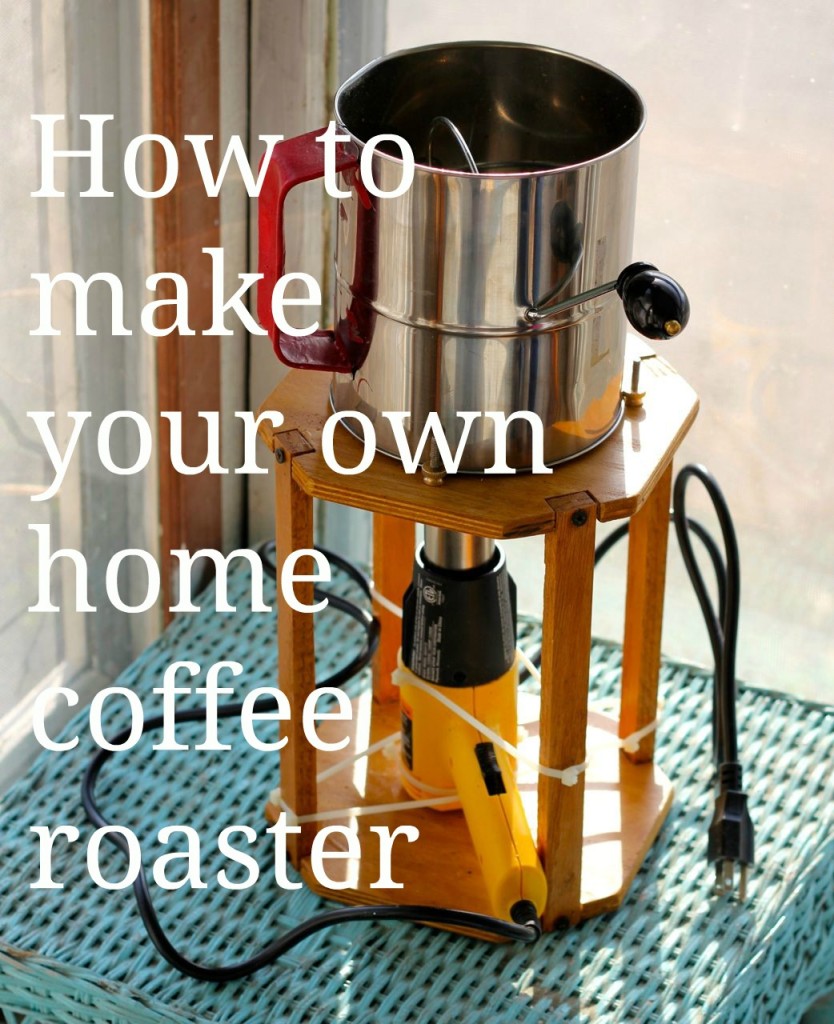
Raise your coffee bar: make your own home coffee roaster!

A couple of weeks ago I published a post written by my own son Timothy (he’s awesome), all about making coffee and why it’s so, erm, empowering to learn how to make a really great cup of it at home. There are many simple hacks that you can employ to make yourself a cup of coffee that is every bit as good (and costing a fraction of the price) as the coffee shop brew, did you know? It’s true. (Better check out that post, if you’re skeptical about this.) Timothy is an expert on the matter (as are my other two grown-up sons) and actually makes coffee for a few lucky co-workers every day, so I let him take it away.
Suffice it to say: I didn’t know that I was drinking mediocre coffee until I was treated to a really great cup of coffee, and it put me over the moon when I learned that I could actually make that really great cup of coffee myself, at home. 🙂 Hooray for learning new things! And huzzah for saving money!
Anyway. I rashly promised to write a follow-up post on how to make the dandy home coffee roaster that Bryan made for us earlier this year. My husband. He’s awesome, too. I think I said I’d publish that post the very next week. Me. I’m not so awesome. I didn’t keep my promise. Until now.
But here I am, Gentle Reader, making good on my promise–better late than never, eh? You’re lucky that it’s very hot and humid and mosquitoey outside, ‘else I’d probably still be out in the garden with the mosquitoes and the teeny tiny grasshoppers and the harlequin bugs with their yellow squishy guts--oiy!!
But that is another post entirely! 🙂 (I did wash the harlequin bug guts off my fingers before I opened up my ‘pooter!)
When we started thinking seriously about roasting our own beans, we did what most people do at first: we used an air popcorn popper and a big bowl. But you can only roast a small amount at a time this way. Our son Matthew (another awesome personage) was doing the same thing on his balcony in St. Louis, that is, roasting his own coffee beans with a popcorn popper, smelling up the entire neighborhood nicely, I’m sure, and he found a video showing this coffee roaster made with a flour sifter and a heat gun. He sent it to his dad, asking if maybe they could make something like that together over Christmas break.

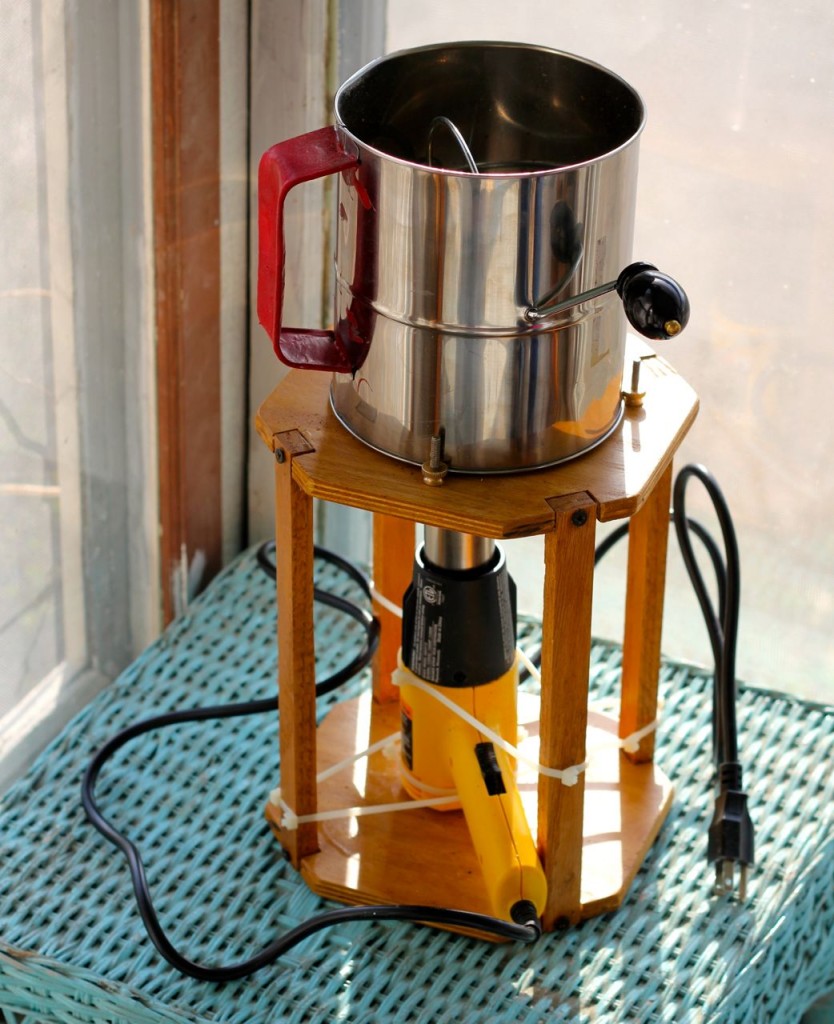
So, over Christmas, Bryan and the boys worked on building it: a home coffee roaster than you can roast an entire pound of coffee in, in just a few minutes.
If you’re not the DIY-creative-life-hacking type, you can spend hundreds (or even thousands!) of dollars on a professional-grade coffee roaster, by the way, but if that’s not in your (cough) best interest from a budgetary point of view, do what we did–make your own!
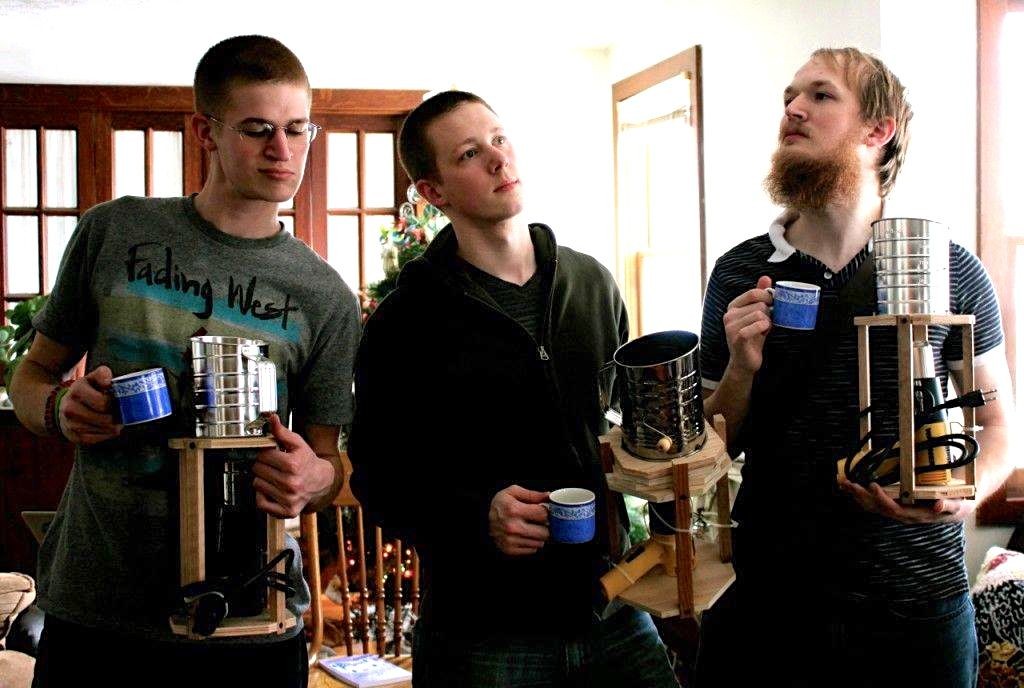
The guys in our family do have a weird obsession with roasting their own coffee beans. Here’s proof of it: (from l to r) Timothy, Matthew, and Andrew posing with their new coffee roasters.
Bryan worked the bugs out of the first prototype, and then made this new and improved model. Which we all love, by the way. It works great, and was not expensive or difficult to build.
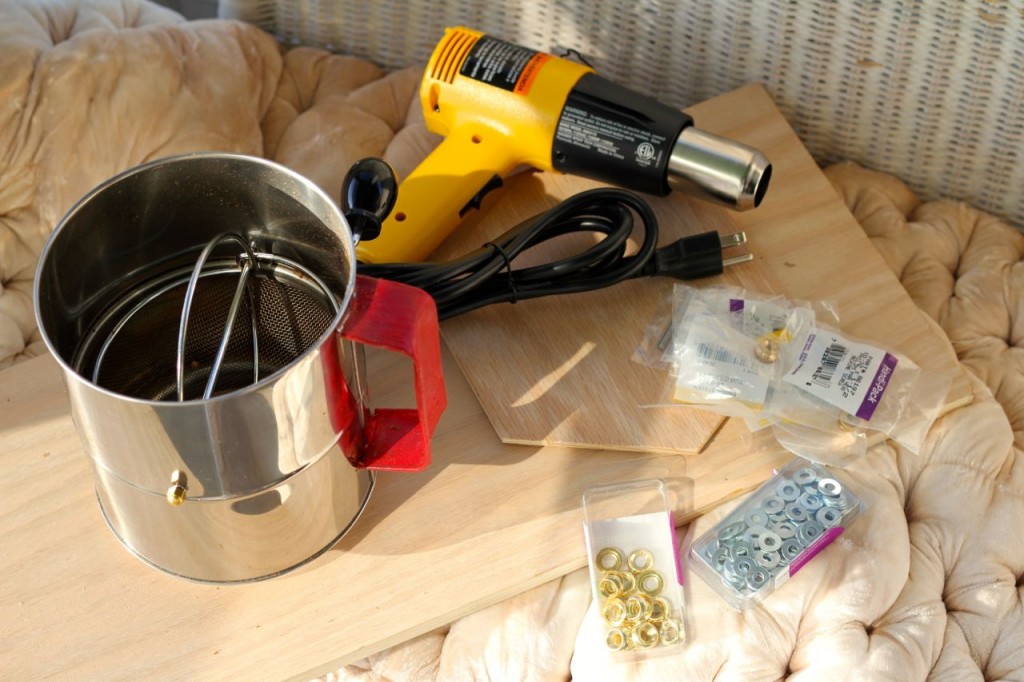
So are you ready to build your own coffee roaster? Here are the supplies you’ll need to gather: (notes from Bryan are in red.)
- quarter-inch plywood scraps (Bryan bought oak, because he wanted it to last forever*)
- wood glue
- various washers and bolts (Note from Bryan: I used sheet rock screws for the stand, as I had them already and didn’t care about looks. Also I used pan-headed machine screws, washers, and a specialty nut–see picture below– with a grip on top for hand tightening for the 3 posts to tie down the sifter.)
- an 8-cup sifter (Bryan again: I don’t recommend a 3-cup but it does work for small 1/2 pound roasting. A 5-cup would be good for 1/2 pound roasts but an 8-cup for 1 pound is better! And I painted the handle with rubber coating, because it gets HOT.)
- a heat gun (1100 Watts . . . basic Wagner model)
- small zip-ties (6 to 8″)
- a few hand tools and a jigsaw (or access to one)
- spray varnish (optional)
- a few small screws for the supports
- knurled thumb nuts* and screws to match
Here are handy links in case you need to pick up a few things, arranged in an appropriately random manner: (These are all affiliate links, so if you decide to pick them up using my links, they won’t cost you a cent more, and you’ll help support my blogging and this content that I’m providing for you, free of charge, so it’s a win-win!)

Bryan started out with a smaller one, but quickly upgraded to this 8-cup sifter.

This is the heat gun Bryan settled on: plenty of heat but not too expensive.

This stuff can be used for so many projects. It’s fun to rubberize things. 🙂

Deft Clear Wood Finish (affiliate link)

You’ll need this strainer to keep the beans from flying out of the sifter during roasting.

We use these little zip-ties for nearly everything around here! They are nearly as handy as duct tape and a few can be carried around in your pocket for zip-tying emergencies!
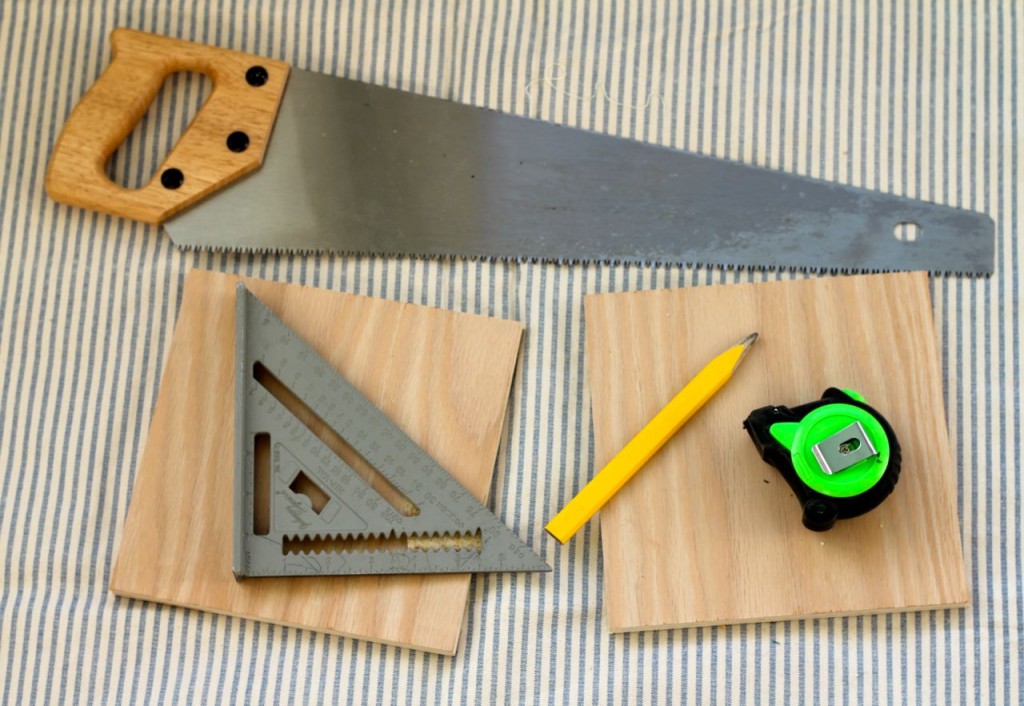
Along with the supplies above, you’ll also need:
- a saw of some kind–a hand saw will work well for the straight cuts, but a jigsaw or key hole saw will be needed, too.
- clamps
- triangle . . . erm, thingy, what’s it called, honey? (Bryan: ironically, it’s actually called a square.) (for pete’s sake!)
- pencil
- a tape measure
- a drill
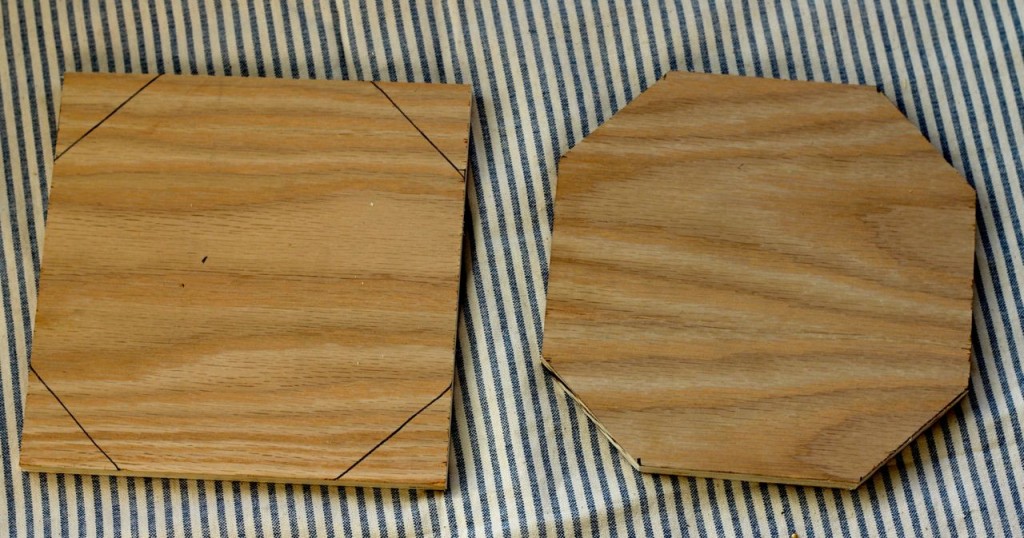
Using the following tools, cut two squares of the half inch oak plywood into octagons (approximately 3″ wider than your sifter).
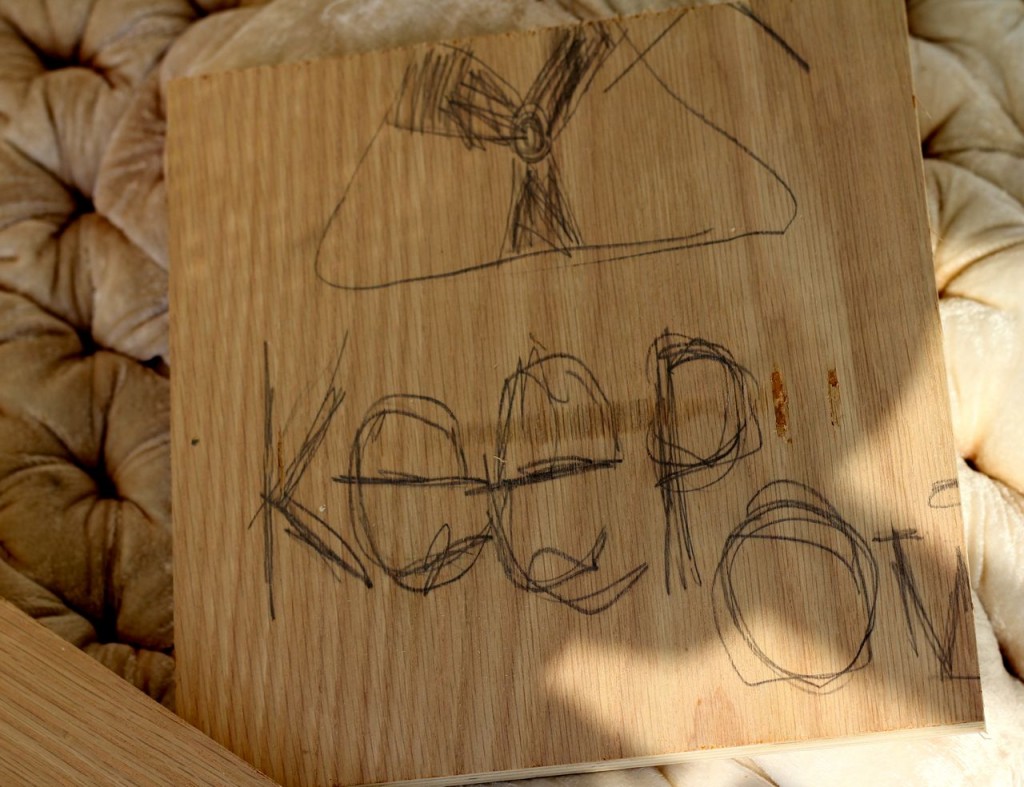
True Anecnote: When Bryan went to find the piece of plywood that he had set apart for this project, it wasn’t where he had left it. He searched all over the house and finally found it–little Mack had made it into a “Keep Out” sign. 🙂 (I guess he likes to work with oak, too, huh Bryan?)
Moving on: You’ll need two of these octagons: one for the top, one for the bottom of your roaster. (Again, the octagons only need to be bigger than your sifter. I am suggesting about 1.5 inches to give you room to work but keep the final stand compact . . . but you can adjust it to your preferences.)
Next, cut four pieces of oak boards for the legs, roughly 1/2″ by 1″ stock and about 9″ tall. (Bryan: There is at least 4″ of space below the upper octagon deck. When you start roasting, you will want to adjust the height of your heat gun. I keep mine about 2″ below the screen bottom of the sifter. Your goal is to have plenty of heat to roast the beans without baking them–which would result in flat, poor-tasting coffee.). These will be your supports. To make a nicer finished product, make notches for the supports (this is optional, but if you have access to a jigsaw, it’s easily done).
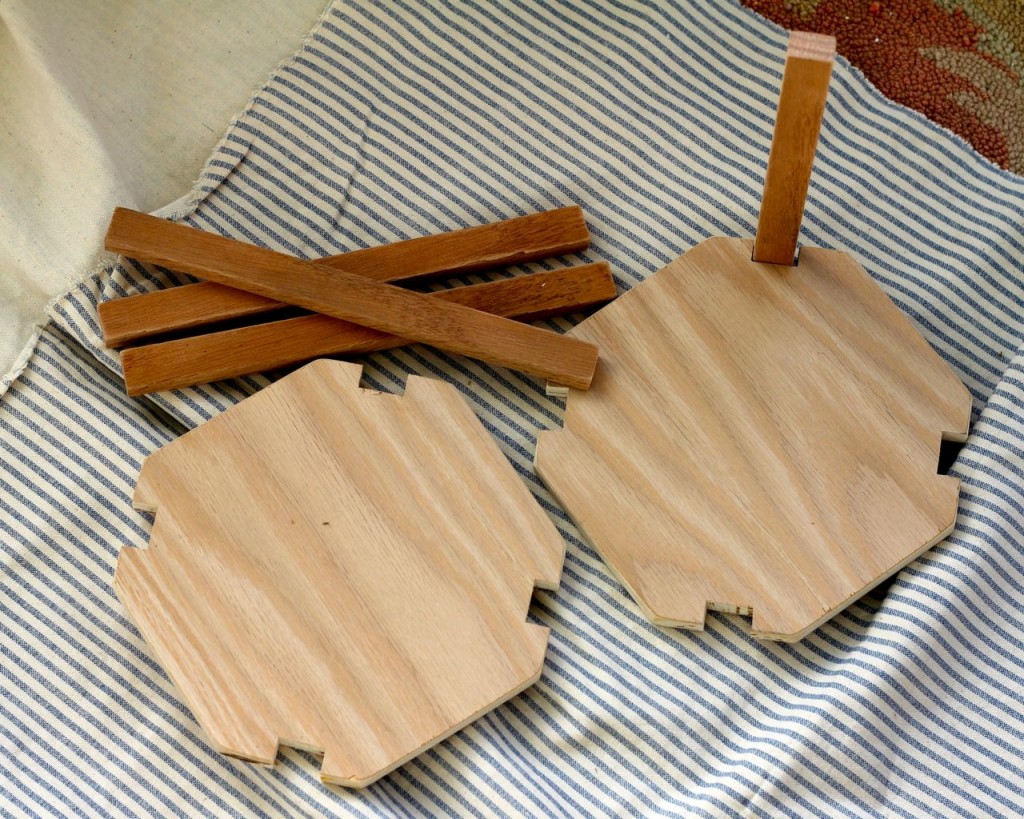
Using the jigsaw, cut a circular hole in the middle of one of the octagons, as shown.
Gather together clamps, the wood glue, the top and bottom pieces, and the four supports. (The messy condition of that glue bottle is not indicative of the messy condition of our home yes it is! no it’s not!)
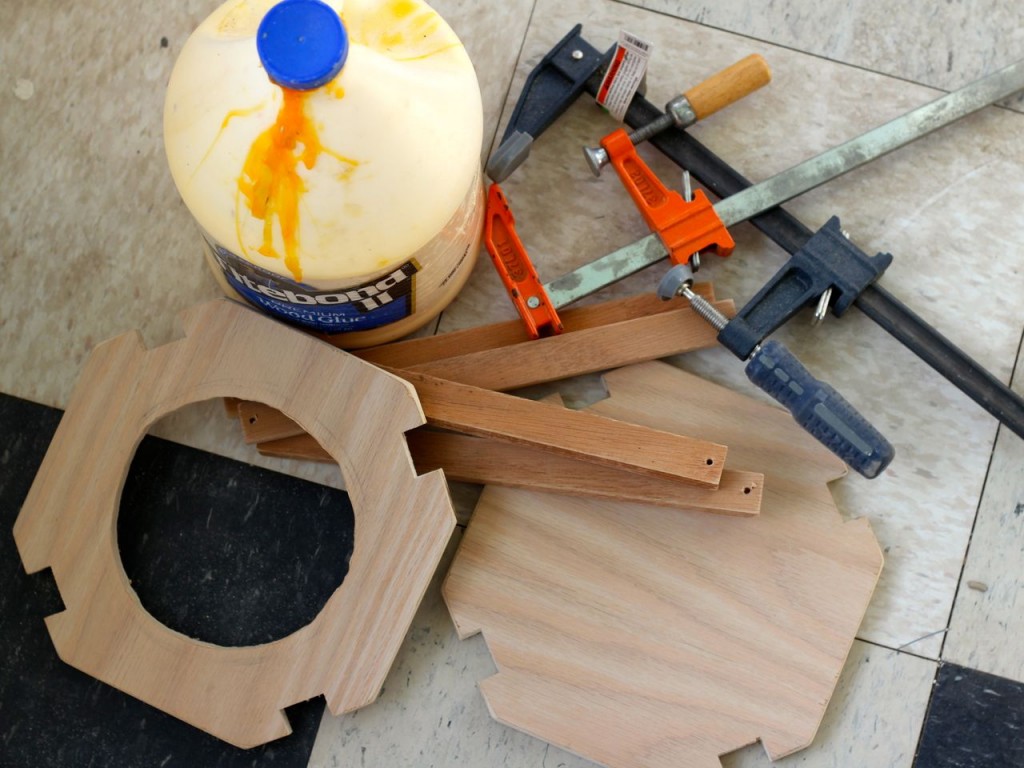
Glue the supports into the notches, and clamp together for an hour or two, until completely set and dry.
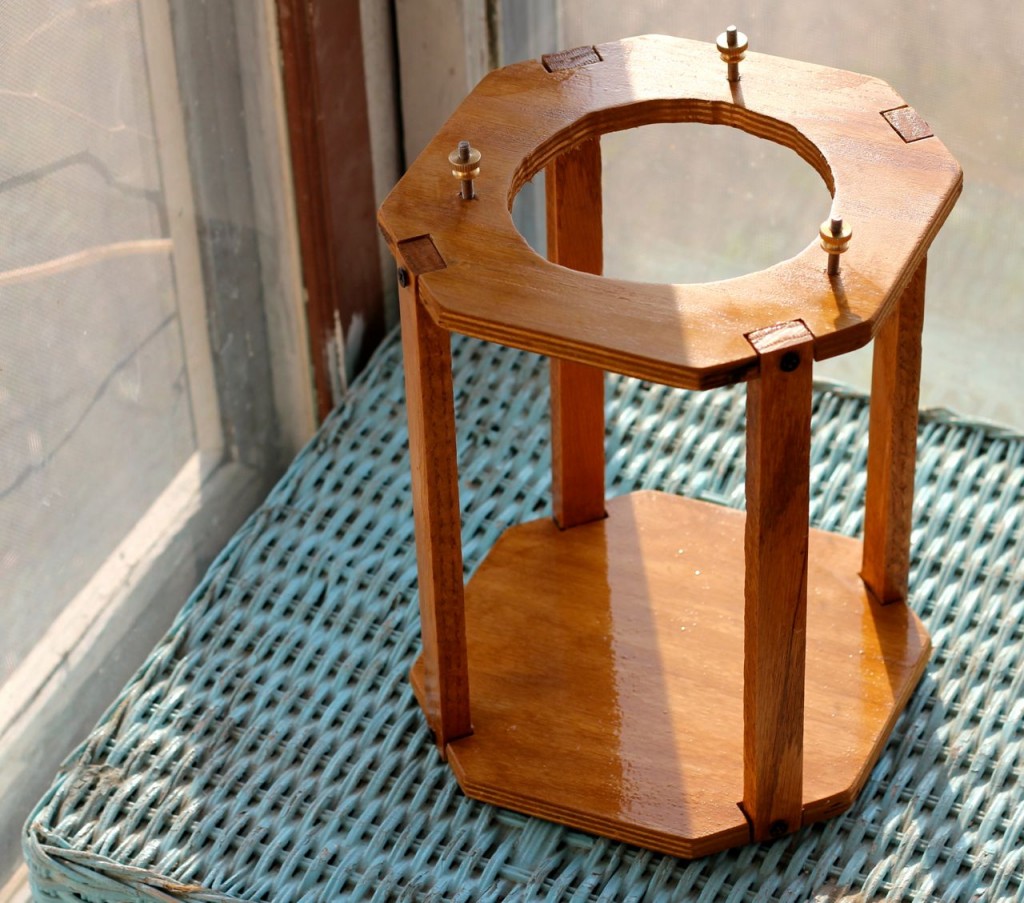
Screw in small screws at each juncture of the supports, for added support.
Spray the entire unit with spray varnish (Deft is what we used) and let dry.
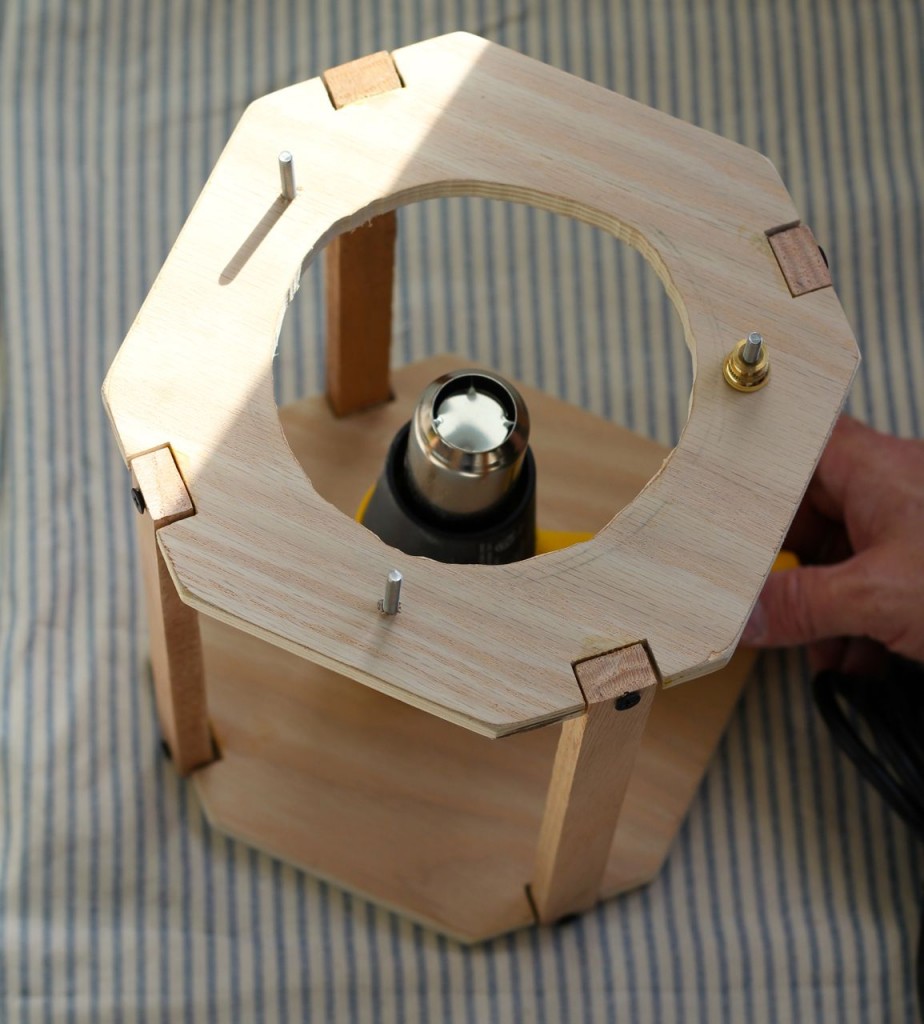
Center the sifter on top of the frame, and mark three spots for screws to hold the sifter in place. Drill holes, and put in screws. (Bryan: I put my posts close enough to the sifter that I could hold it in place with a washer and a nut. And I liked using the knurled thumb nuts, so I can tighten them easily by hand. I bought them at the local hardware store.* This allows loosening of the nuts, if needed. I usually tip over the stand to pour out the coffee, though–the lazy way!)
(I don’t know about you, Gentle Reader, but the term “knurled thumb nuts” makes me laugh. 🙂 )
Anchor your heat gun with zip ties (Bryan: Again, the lazy way but it works: use blocks of wood to move your heat gun to the height you need to get the proper heat). The top of the heat gun should be around 2″ (you will adjust this distance, depending on the temperature and also if you roast with an open top or a cover) from the bottom of the sifter.
Hey, you’re ready to roast your first batch of coffee beans!
(Some tips and warnings about roasting: The roasting creates a lot of heat, steam, and chaff. Make sure you operate safely. Keep the kids away and you might want to invest in a strainer to cover the top of the roaster. You can also use a wet cloth to minimize the chaff, but don’t let it ignite from the heat! Roasting should take anywhere from about 10 to 25 minutes, depending upon conditions and the size of the batch. Longer times are probably the result of poor roasting conditions and the beans will be baked (not good) instead of roasted (what you want).
If you’ve never roasted your own beans before, skedaddle over here to Sweet Maria’s. There’s an excellent video on roasting beans–it’s done with a popcorn popper, but the essential information is very good. My son Andrew (also quite awesome) shared the link with me.
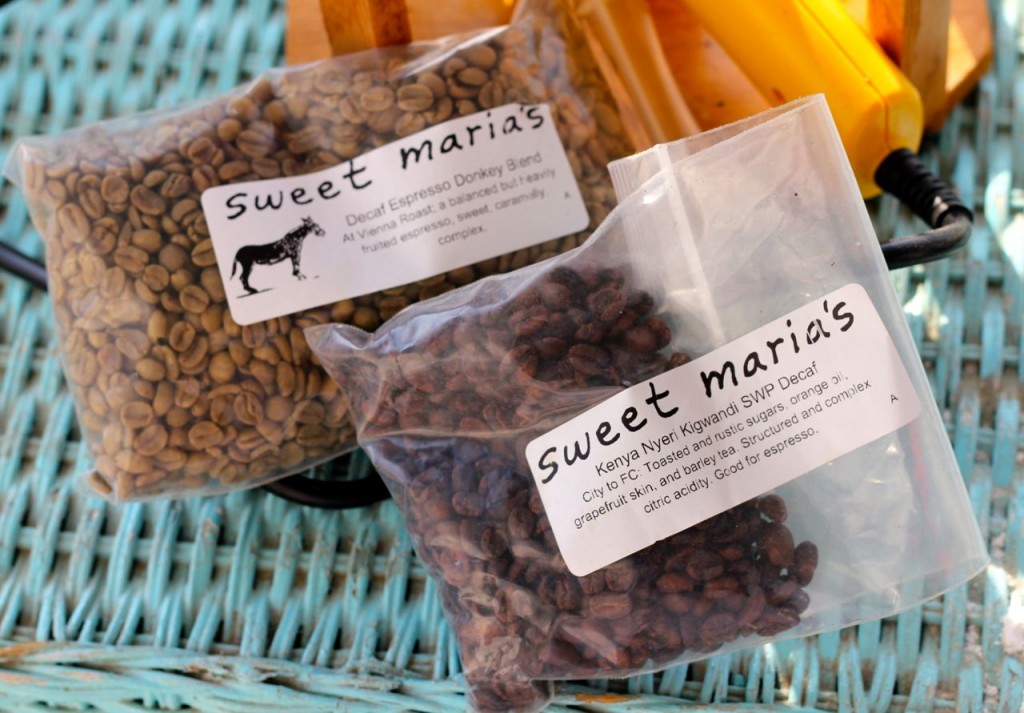
Check out the difference between green, unroasted beans (in top bag) and the darker roasted beans (bottom bag).
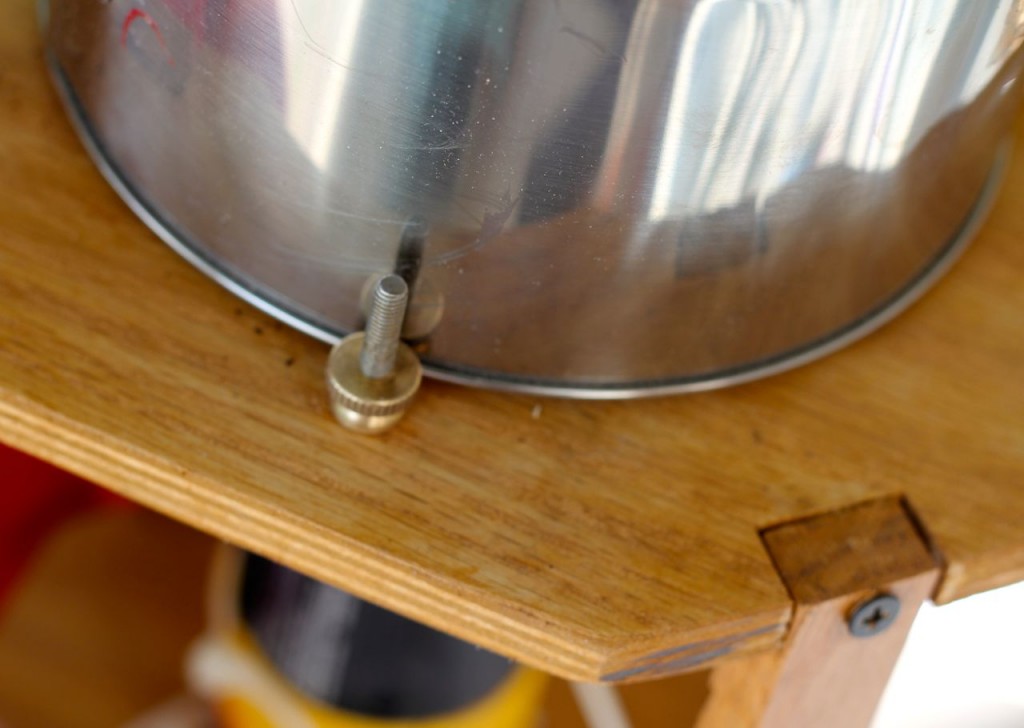
Here’s a close-up of the knurled thumb nut assembly. (hehee)
That’s a specialty nut that Bryan found just for this use. I live with a lot of specialty nuts, just sayin’.
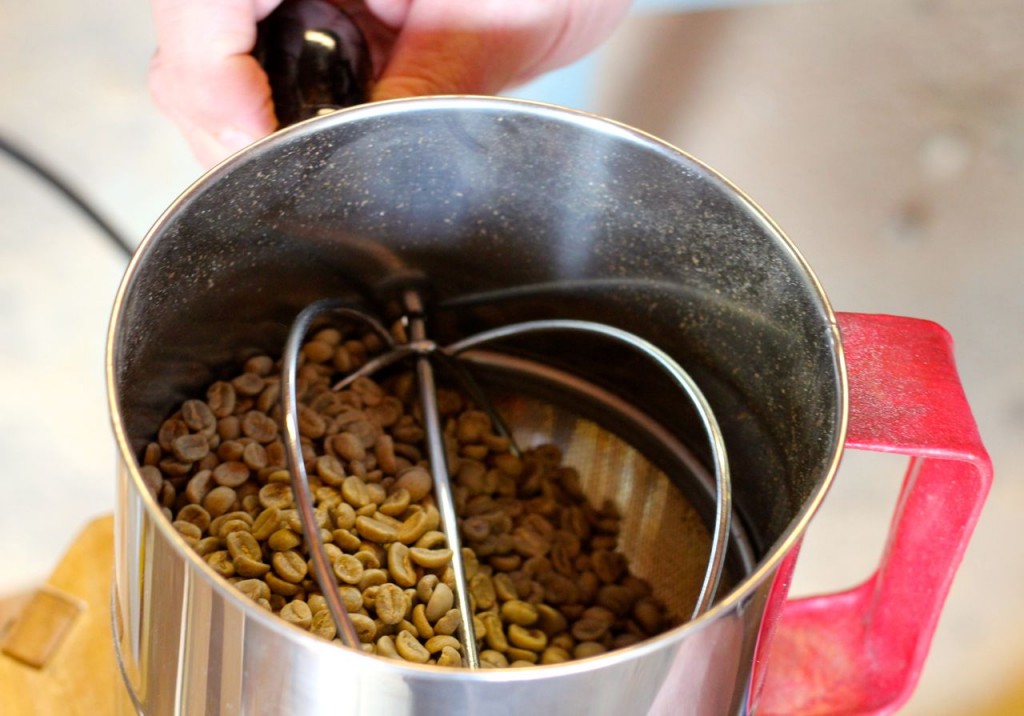
Roasting beans in action!
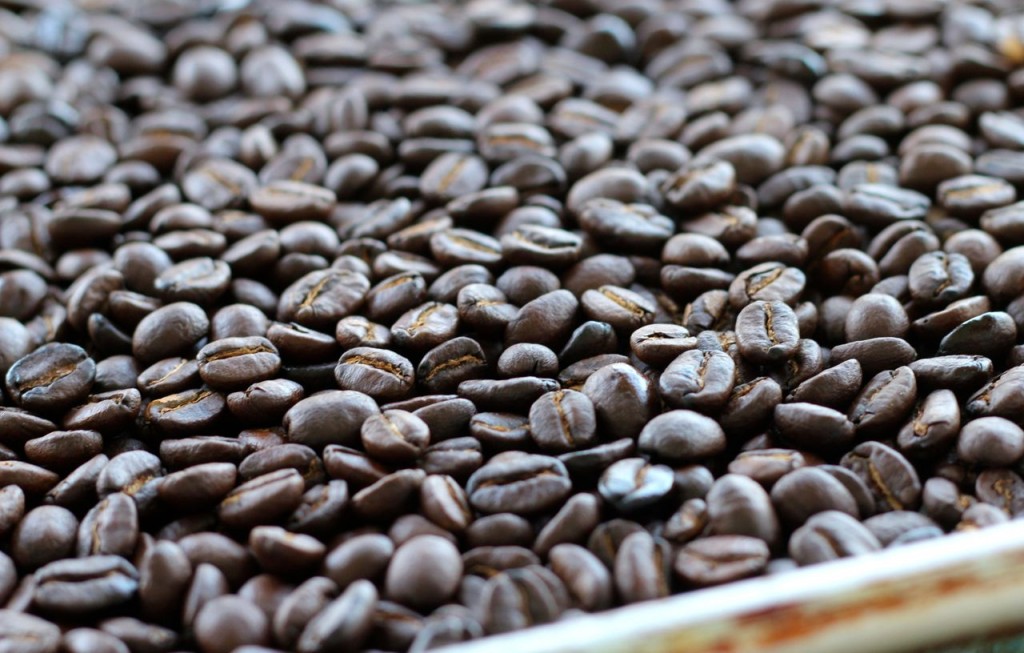
After a successful roast!
A disclaimer: the sifter gets very, very hot during roasting, so this job is best done by a cautious adult-type person. It’s not the chore to delegate to your 9-year-old, say (though he may beg to do it because–let’s face it–the heat and the danger and all these warnings appeal to him).
After Bryan roasts the beans (a pound at a time), he dumps them out on a cold jelly roll pan, and then to cool them even faster, he dumps them out on another cool jelly roll pan. This is a messy chore, and there will be chaff floating about, but also your house will smell like a coffee shop all the rest of the day.
Which is pretty awesome. 🙂
Now you’re ready to build your own roaster, grind your beans and make your best-ever cup of coffee!
Hey, if you don’t understand any part of these directions, leave a note in the comments and I’ll get my hubby to clarify any instructions that might not have come through loud and clear.
Now if this all just whets your appetite for learning more about roasting your own beans, here are a few resources just for you.
Matthew wrote two blog posts about roasting your own coffee and here are also a couple of forums you might want to check out: Sweet Maria’s and Home-Barista.com.
Also there’s a definitive ebook on the subject which is a bit pricey, Scott Rao’s The Coffee Roaster’s Companion, so I’ve never seen it, but the author has a website with a sample which is pretty doggone helpful, at that.
I want to thank you all for prodding me to make good on my promise to write this post, and to the kind coffee savant fellas in my life: Bryan, Timothy, Andrew, and Matthew. Thanks! <3 you guys!
*hugs*
*(cough) Bryan is locally famous for over-building things. Not that you heard it from me, but when Amalia and I tried to move the massive dog kennel that he built for Ollie recently, we both were nearly driven to swearing–it is that massive and heavy. And I promise, we don’t swear except in extreme situations.
And not even then.
😉
Well now this is totally cool. We have access to free coffee beans in the foothills here in Mexico. Well you actually go and pick up what is missed by the pickers as long as you get the ok from the owner of the coffee plantation first. They will usually allow you to pick up the beans in a small area so you can get a couple of pounds if you don’t mind the work. I have a sister-in-law that does it but I have never given it much though until now. NOW I will be going with her the next time she goes after some beans. My table may not be as fancy as yours but I am sure I can put this roaster together…As I keep reminding my wife, You women sure got the cream of the crop when it comes to husbands….thats for taking such good pictures when putting the roaster together…it’s a how to book in pictures…great.
Chef, FREE coffee beans, straight from the plants. You are blessed! I’d be out there with you, picking them up! I agree with you, that Maria and I really got lucky! We won the husband lottery, to be sure! Send me a picture of your roaster when you’re finished. I’d love to see it!
This post feels somewhat incomplete without this photo: https://scontent-dfw1-1.xx.fbcdn.net/hphotos-xtp1/t31.0-8/10827929_10205421521395209_4299559281048255011_o.jpg
Forgive me. That thoughtless omission has been fixed. Thanks, honey. 🙂
AWESOME!! I love it!! this is great – I always believed that the fresher the roast, the better the coffee, and this is a way to get the freshest roast!! Thanks for sharing this great idea!
You are welcome, Michael!
Wow what a creative project! Great job! Thanks for joining the Link-It To Me link party, I hope you will party with us again next week!
Thanks so much, Chantal. I’ll try to!
Awesome…an answer to my prayers. I am working with a tribe of Native Indians in the Darién peninsula of Panamá. They are growing their own high quality coffee that is bold, but sweet, and a kick. But no roasters available…til now! Thanks to you and your family, will keep you posted, and promise some coffee your way!
Bob Arias, aka…FlacoBob
Bob, if there’s any way I could help, let me know! I’d LOVE to try the coffee (let me know when you need my address!). 😉 Blessings!
If I place a mesh over the sifter to keep chaff in side, can I use this in house? I live in Canada and during winter I can’t roast outside.
Hm, Paul, you could try it but I wouldn’t recommend it. We just bundle up and still do the roasting outside! Or if you have a protected outbuilding or garage that might work, too. The problem is the dust and chaff goes EVERYwhere, and it would truly be a headache to clean up if you did it inside!
Thanks for this great write up! I’m very interested in making one of these, it’s crazy how expensive some of the roasters (even ones specifically for home use) can be!
A lot of other similar pictures I’ve seen of heat guns & sifters use a drill to turn the sifter, obviously that’s superfluous, but I am curious how quickly it gets old to crank the sifter for 15 minutes straight with each roast?
Greg, I suppose it depends on how much coffee you grind? But it does get old after awhile. Since I wrote this post, my hubby made a new-and-improved coffee bean roasting set-up that I’m writing about now. Subscribe to my blog to get that update when I get it out!