Sheet Mulching = Hope for the Beleaguered Prairie Person

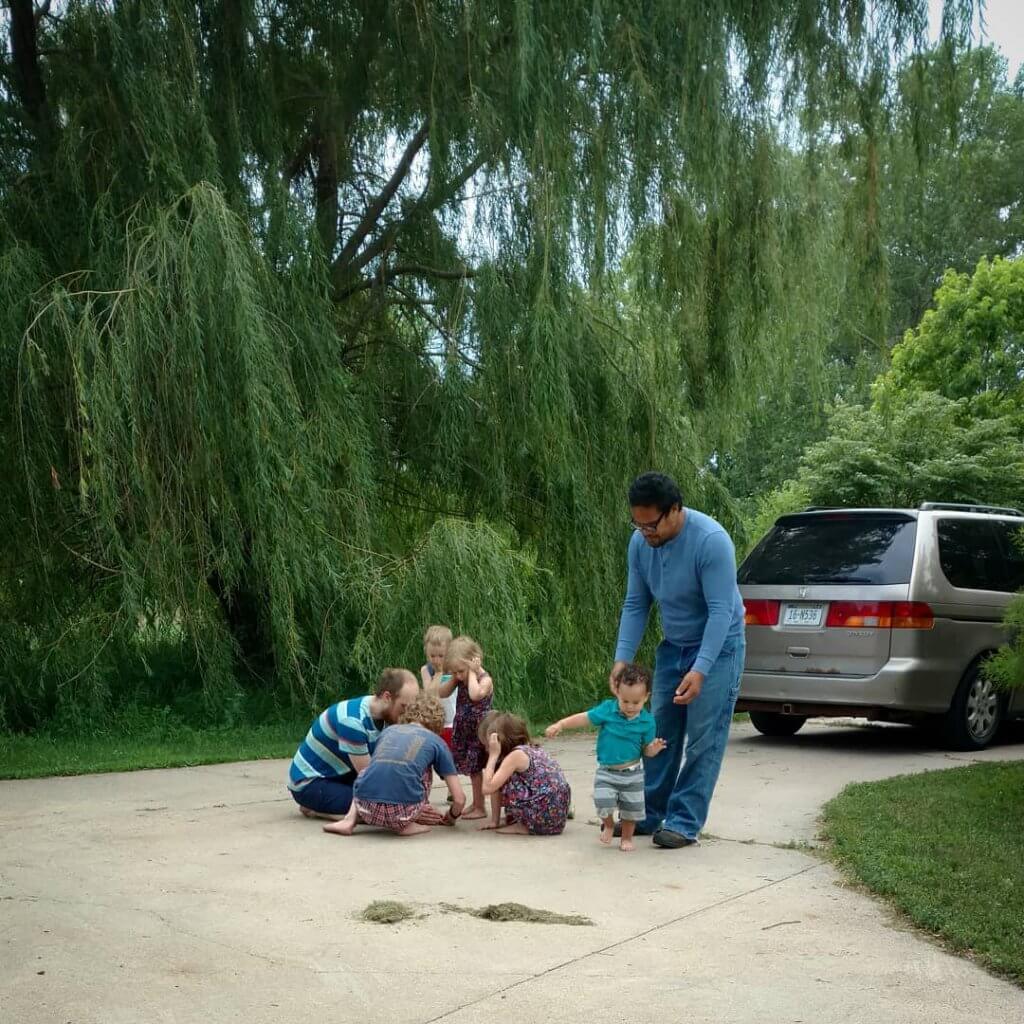
This photo has nothing to do with sheet-mulching. It has everything to do with the fascination of smoke bombs, explored by two of my sons and five of my grandies, and my hunky son-in-law.
The Situation at Hand
When we moved out to our little acreage (nearly twenty years ago), I was struck by the lush prairie grasses that grew so well over most of our land. They were so picturesque! I could imagine Laura Ingalls Wilder in her brown calico dress (not the prettier blue that her sister Mary wore), playing in it (though I think the prairie grasses that she mentions in her books were taller than the grasses that now grow around our place).
In any case, these native grasses are amazing! They keep the topsoil anchored so the occasional (ha– occasional) winds don’t blow it away. Thick grasses also keep invasive weeds from getting established, and they hold the precious soil in place so that when heavy rains come, it doesn’t all wash down to the pond, en masse.
From the start, I realized that the robustly-growing, lovely native grasses were my friend.
My Dad brought his little Ford tractor out that first summer, and we plowed up a little patch of sod, and I planted it to squash, melons and beans. And heirloom tomatoes and peppers. A few flowers. I discovered from a quick soil test that–while it was low in organic matter (I would fix that, over time)–the pH of my brand-new garden plot was perfectly balanced! Amazing! I harvested bushels of crops that year. We were blessed by such rich soil! It was hardly fair; it seemed almost too easy to grow things in it. Such a wonder. I swept all the ribbons at the county fair. I was a veggie-growing boss lady.
The Problem Rears its Grassy Head
Early the next spring, I was surprised to see that the prairie grasses were not only growing back into the edges of my garden space, but were also popping up in clumps all over the garden itself. (What affrontery!) Pulling those clumps, furthermore, was an athletic exercise. The grasses were (and are) tough, and valuable to the Great Plains, I realized this. The qualities that make them so vital also make them a real headache. Any plant that has roots that run sneakily underneath the surface of the soil bears watching. Clearly, my impressions of the friendly nature of those grasses were premature. The grasses weren’t my friend–not in my garden, at least.
The grasses (thunder clap) were my enemy.
The Part where I’m Smarter than the Grass
Subtitle: Hope in the Heartlands
But. I’m aware of the curse that Adam and Eve wrought down on our heads for the nonce, concerning weeds and pain and hardship and whatnot, and it takes more than weeds and grasses where they don’t belong to scare me. I’ve always had a heavy hand where using mulch is concerned (I blame this lady for that), so I began a habit that I’ve continued to this very day, which is to gather mulch like it is spun gold (okay, well, nearly): bags of leaves, rotten hay, straw, grass clippings, wood chips. If it was free, I gathered it. And I heaped it in wanton abandon on the clumps of prairie grasses that were so hard to pull.
It worked! It also kept me busy and out of trouble, gathering and spreading mulch.
This strategy works well to discourage the grasses, or weeds, on a basic level, but I’ve learned that there are times when you might need to smother the grasses more quickly and thoroughly. Don’t even imagine that you can dig a hole in the grassy sod (Experience speaking here) and plant something–anything–and have it survive.
If you want to plant something quickly, a more extreme approach is warranted. Last fall, for example, with plans to put a second hoop house (yes!) in my main garden space firming up, I looked around for another area that I could use as growing space. Well, guess what? All our spare acres are covered with my dreadful enemy/friend, (this is such a complicated relationship) brome grass. I knew that I needed to smother it en masse, or I’d be pulling it every day for the rest of my natural life.
Possibly longer.
A Bit of Weirdness
Future Scenario: Mack, who has taken over our farm after Bryan and I finally perish (both of us cranky, brittle worn-out geezers in our 90s, in a wacky ATV-related incident) says to his wife: “Weird, every time I’m out in the garden I feel this eerie cold breeze near the clumps of brome grass that are growing into the edges of Mom’s garden . . like a ghost or something is worrying over them, pointing them out to me . . . .” Sainted Wife: “Are you ready to find a house in town yet, dear?”
A Miracle!
If you don’t fancy the idea of your future dead self worrying over the brome grass taking over your gardens (Mack: “R.I.P., Mom, R.I.P.!! You’re giving me the creeps!”) you might want to consider sheet mulching. Also called lasagna mulching, it’s a beleaguered prairie person’s Best Friend Forever.
I employed this method, in fact, to cover this new garden bed, where I recently planted tomatoes and peppers. Last fall, this area was lush with knee-high prairie grasses. Thick. Healthy. Invasive. Awesome, but not in a good way. Today it is a tidy bed with over 100 tomato plants and 100 pepper plants growing in it (that I’m currently trying to keep the wretched, cheeky bunnies out of, but that’s another story!). *phew*
This was only accomplished through sheet-mulching this space last fall, and letting it sit, freeze, thaw and decompose over six months’ time. It was worth the trouble!
But. In my flying-by-the-seat-of-my-pants way, I found myself this spring–even with the beautiful new bed full of tomato and pepper plants–woefully deficient in garden space. Yes, we are still planning on building a second hoop house this summer and fall. And Yes, I planted too many squash and melon plants (to transplant) for the space that I had available. Yes, I hate to toss plants! AND YES, your gentle blogger can be a complete nitwit in the planning department. (“‘Planning?’ What’s that?”) <—–moi *wincing*
So. A strip between the orchard proper and the new tomato/pepper bed seemed like wasted space to me, and a perfect melon-and squash-growing strip. I dreamed of this one night: turning it into a long narrow melon and squash bed! I woke up happy and planful. (YES I dream about my garden. Somebody, help me.)
I went to work, gathering the supplies I needed, and started making my new bed. No, I didn’t use a tractor or a rototiller (key to easy-peasiness) but just laid things down.
A few days later, I was ready to plant my little transplants, which were still in pretty good shape (*phew*).
Here’s how I did it. How I went from this:
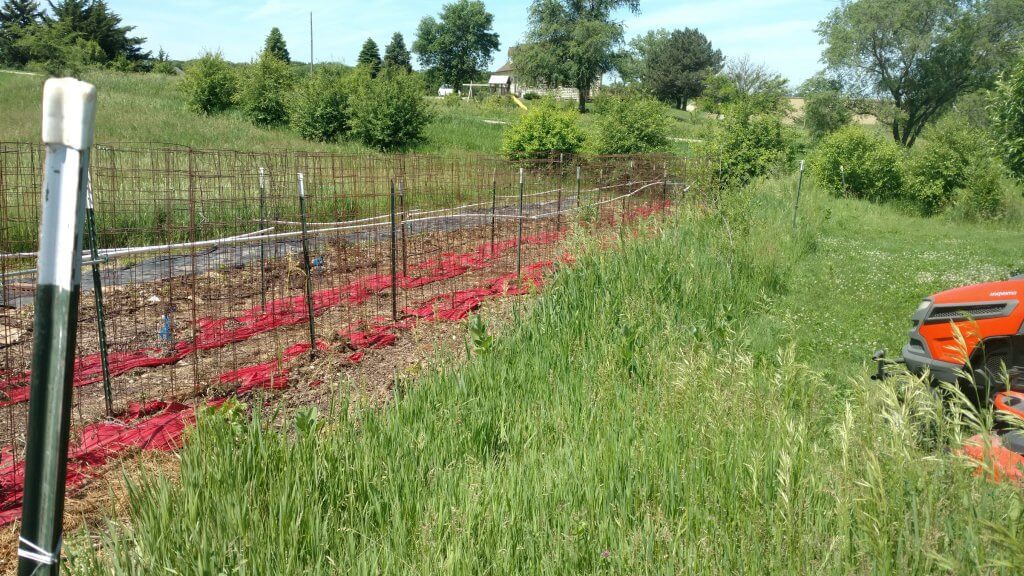
The fresh new bed will go to the right of the planted area, which is surrounded with tomato cages.
to this (picture of planted bed) in just a couple of sessions of hauling, spreading, and planting. Ta-da!
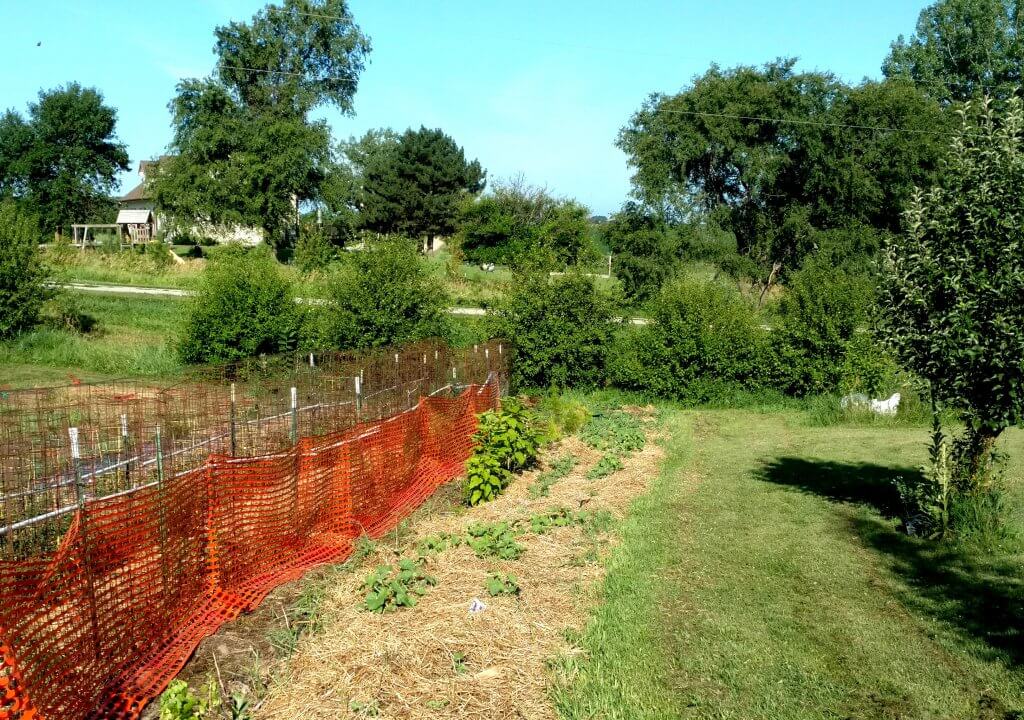
After! ta-da! Nice new bed with plants growing happily in it. The drip tape is hidden underneath the straw. (The snow fence is part of my continuing effort to keep the bunnies out of my tomato plants! (It seems to be working.)
Caveat: If you desperately need a garden space but don’t have the time to gather all the following supplies, you can make a passable sheet-mulched area with only newspapers and plenty of organic matter (straw, hay, or leaves). But if you have the time and inclination to gather up the following, your resulting garden will be ahead of the game and you, gentle reader, will feel so much more clever.
Caveat #2: It’s better to sheet-mulch a small area thoroughly, than to sheet-mulch a large area haphazardly.
Supplies needed for Sheet Mulching:
- large sheets of cardboard and/or newspapers, enough to cover your area
- seedy weeds or hay–1-2″ over entire area
- fresh grass clippings or leaves–1-2″ over area
- manure (I used bedding from the chicken coop)–2-3″ over area
- straw and/or hay–9-12″
- compost–another 2″ spread over area
- more straw, hay, or dry leaves–2-3″ over area
This is how I do it:
1. First, I cut out all weed trees and mowed the grass, hoarding (of course) the clippings. (Word to the wise: if the grass hasn’t been mowed ever, or not for awhile, you probably ought to do a quick walkabout through it before mowing. I found the following in that long grass: a piece of rebar, an old milk jug, several pieces of shredded soaker hose, and a t-post half-buried in the dirt, any of which might have made a mess of my mower blades!) (*cough* Been there-done that.)
2. Cover with a thin layer of carbonaceous material (this is a good place to put anything that might have seeds, like hay or pulled weeds). Water this in well. The water will bring up to the surface the organisms that will turn your mulch into rich earth. And earthworms!
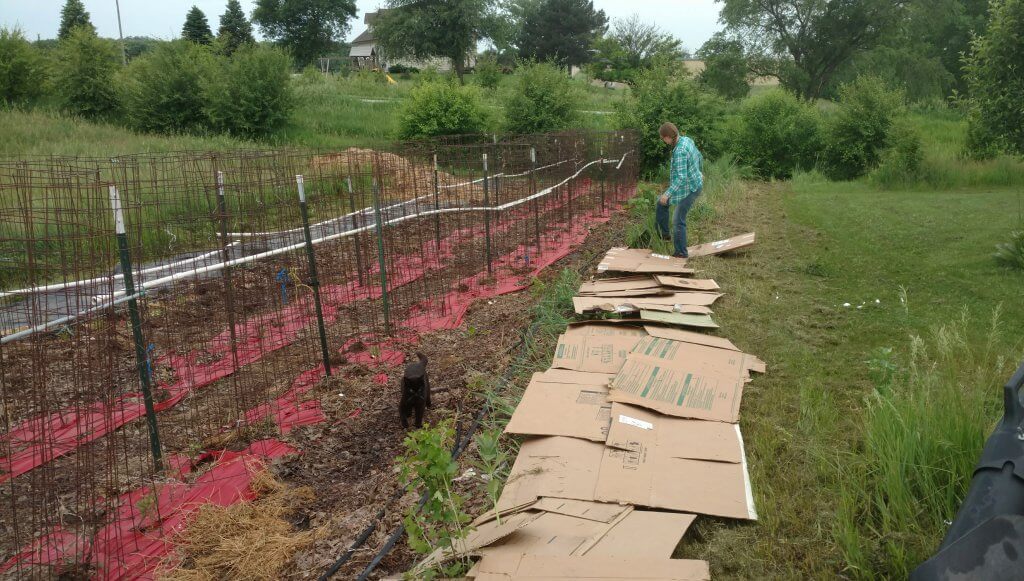
Here my helper, Hannah, is spreading cardboard on the mowed grass.
3. Lay down your weed barrier: you can use thick layers of wet newspapers, though I prefer to collect big sheets of cardboard from a furniture store nearby. (I’ve done this so many times–between melodrama cardboard needs, and mulching cardboard–that the nice folks at the furniture store automatically start for the back room and the cardboard stash when they see me coming. I’m going to take them pie one of these days.) Cardboard is easier to work with than newspapers, and the process goes much faster. (Pro tip: don’t even think about doing this on a windy day!)
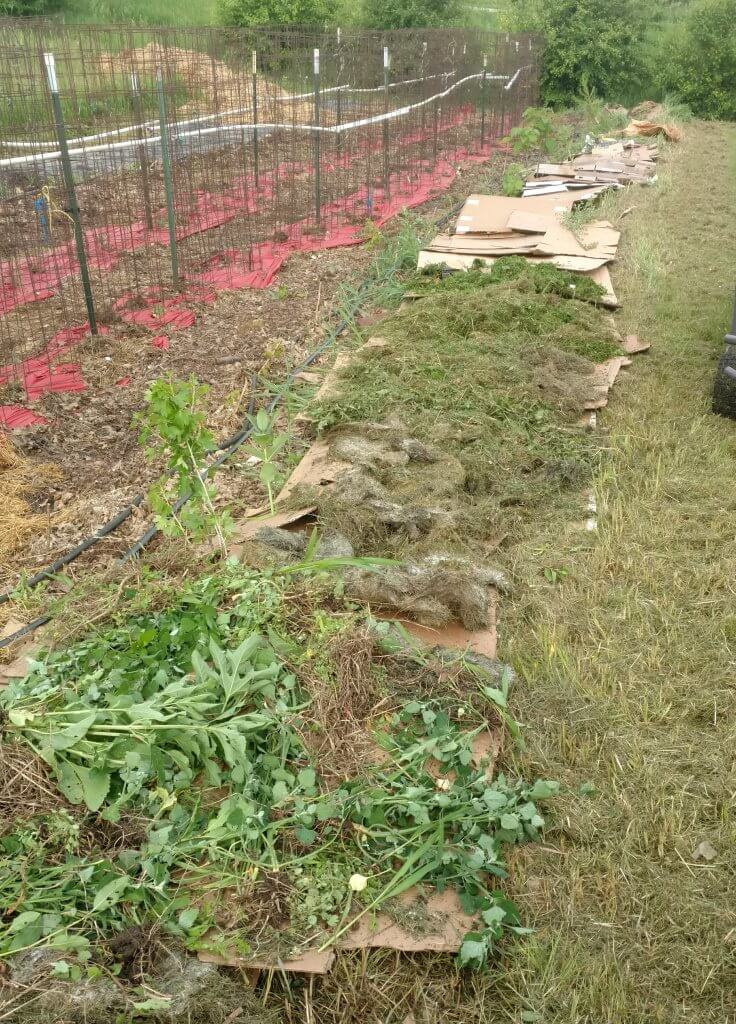
A layer of cardboard has been spread the entire length of the bed, and now we are heaping a couple inches of freshly-cut grass and weeds on top. (We will add more cardboard to cover up the bare areas.)
4. Cover with layers of weed-free green organic matter: fresh grass clippings, if you have them, are perfect, also pulled weeds, leaves, etc. It doesn’t have to be a thick layer.
5. Now spread a layer of manure (or compost) if you can find some (I don’t, alas, have a stock of compost currently, but I do have a few wheelbarrow loads of well-rotted woodchips, and chicken manure-laced bedding, which I used.) Again, this does not have to be a thick layer.
6. A layer of straw is very nice here, if you have it, and it SHOULD be a thick layer (9 to 12″), to cover the entire glorious mess. Hay will do also, but I prefer straw when I can find it.
Pro tip: It’s very smart, when you are gathering your supplies, to gather some extra straw and leave it close by the new bed, to cover up any spots that need it, as everything settles.
7. 1-2″ of compost is next, if you have it. (If you don’t, we are in the same sorry boat!)
8. Another layer of hay, straw, or leaves (2 to 3″) tops it all off nicely. You ought to be nicely weary, a little sore, and very happy with yourself. So it’s obviously . . .
. . . Time to celebrate! Pour yourself (and your helpers, if you are blessed with them) a bit of bubbly and cut into the fresh panful of hot fudgy brownies. Be generous with the ice cream!
Now you can plant your little hoarded seedlings. A few tips about planting into this new bed will not go amiss at this time:
- If you want to feel horribly clever, set up your watering system–I laid down drip tape, but soaker hoses or an appropriate sprinkler will do, also, of course–before you plant.
- To plant tubers or potted plants, just pull back the top layers until you get to the cardboard. Cut an X in the cardboard, peel back the corners, dig a hole and throw in a double handful of compost and plant your plants.
9. You can plant directly into the new bed if you like. To plant tubers or potted plants, just pull back the top layers until you get to the weed barrier. Cut an X in the cardboard or newspaper. If you are transplanting a large plant, peel back the corners of the X. Throw a double handful of compost in the planting hole and then put in the plant. Pull the layers and top mulch back around the plant, water well, and you’re all set. Planting seeds is easy too. Just pull back the top mulch to the compost layer and plant your seeds. You may want to cut through the weed barrier below first, depending on weed pressure below the barrier. If you are planting seeds, be sure to water regularly, as compost on top of cardboard can dry out quickly.
This easy technique of sheet mulching can build remarkable soils in just a few years, which is a wonder in itself, isn’t it? It’s all about the organic matter and all the wonderful biological processes that take effect as the leaves, straw, grass, etc. decompose. And the worms, who don’t take days off.
A miracle.
You can grow something in that remarkable soil, too, that will bring you joy and good health. I planted watermelons and Honeynut squashes in mine. Watermelons–like summer–are all about joy to me.
Thanks for popping in, gentle reader. If you gained anything from this content, you might want to sign up for further posts, by putting your best email address in the little box up under my mug shot. I won’t spam you. Ever. Pinky promise. And for more fun, follow vomitingchicken.com on Facebook and Insta. And thank you. You mean the world to me!
*hugs*
- Make these Egg Noodles in 4 staggeringly simple steps . . .
- Fleeting Days of Rhubarb-Cherry Bars . . .
This is excellent! Had been thinking of sheet mulching our garden after this growing season is over. Now you’ve narrowed my research down to, well, this!! Thanks!
You are welcome, Bill. Let me know how it turns out! And I just heard that you can’t throw away cardboard in your county. Here ya go. This is what you can do with all those Amazon boxes!
My dad used to do that, but probably not to that extent. I did it in my garden in Swanton years ago but I wish I had known how to layer like you describe. My dad always preached–never just hoe weeds, pull them out by the roots, which is why I now have arthritis in my knees and hands (well, it’s nice to have something to blame anyway). And the prairie grass, good on you to find a solution. I love prairie grass when it’s not in my garden. Oh, I don’t have a garden anymore.
Yes, your dad was a wise old farmer! A weed won’t come back if it’s pulled out by the roots!
We had great luck with sheet mulching at our old house! We did 6 raised beds in our new yard this spring and planted in them immediately (couldn’t wait!). Not everything is doing very well, but I didn’t think to cut an X through the cardboard so that may be the problem. I’m looking forward to layering them up a little more this fall and seeing the results next spring! It’s not too early to be looking ahead to next year, is it?!
Carolyn, not only is it NOT too early to be looking forward to next year, it’s also not too late to plant a fall garden! We’ve got nearly 3 more months to grow things in! I’m planning to plant: carrots, beets, cilantro, zinnias, lettuces, spinach. And maybe a few other things, if I can clear up a few more little spaces . . !!
Looks like a mix of Ruth & Paul Gardening, lol Happy to see you found a way to beat those weeds! Do you still have that sign out front “Woodchips Needed” or has it faded & fallen down? Business must be boomin’ if you’re adding on! You’ve got the right idea to add on a little at a time to keep the weeds under control. It’s looking good…Happy Gardening!
Haha! Yes, a mix of Ruth and Paul. I think you nailed it, Rose!
Ah-ha. So, my cardboard stuff I did when we added on to our deck this spring, and I didn’t want to de-sod/dig our new flower beds has a name? Cool! I’m very grateful to have a gardening mom who taught my “houseplant” self (her name for non-outdoorsy people… like me ) some of these little tricks! Hooray for YOU passing them on too! We “houseplants” need them… incidentally, I keep houseplants alive better than my mom… hmm.
Becky, YES, it has a name and is all the rage right now among permaculture devotees! (Actually I didn’t know it had a name either. I’ve done it many times to cover problem weedy patches, and old established grasses that I want to turn into garden spaces, and I was talking with my son Matthew–a permaculture devotee and a well-read one at that) and he said “Oh, you’re gonna do some sheet-mulching?” and that’s how I learned that it did, indeed, HAVE A NAME. News to me, too!